Over the next few weeks, I plan to be sharing a bunch of holiday-focused content on my blog as well as on my social channels. While Thanksgiving and Christmas seem like a long time from now, the reality is that in less than 2 months the turkey will be gracing your dinner table, and this is the year to make it the best turkey yet.
So… let’s kick off this series with America’s runner-up national bird,
the turkey!
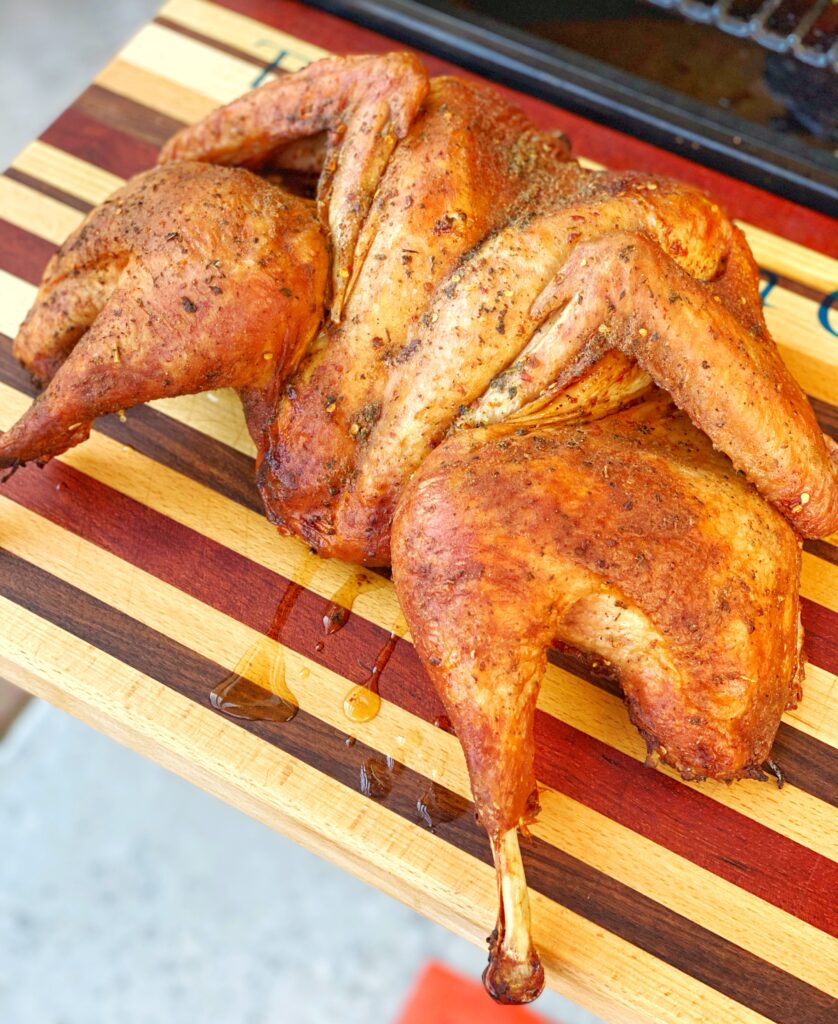
Now I know, many of us are in for the Thanksgiving holiday just for the sides and dessert. The turkey– you could go either way on it. If there’s adequate gravy, then granny’s dried out turkey is palatable. But few would say that their turkeys usually come out juicy and delicious. That is until you’ve done it on the Traeger.
My wife is a traditionalist on turkey– so the first year I wanted to smoke one we compromised and she got to roast one in the oven too. You can guess which one came out more delicious. Just guess 🙂
We’re now fully on-board with Traegered Turkeys, and did a practice run this past Sunday to start getting it perfect for the upcoming holidays. So now is your chance to grab a turkey while it’s cheap and give it a try on your Traeger. A practice bird will help you feel confident in your cook for the big day.
Brining
The talk about brining a turkey has been around for years. It always sounded like a lot of extra work and mess, but once we tried it, we were hooked. It’s definitely worth the time (the turkey will be defrosted anyway) and the effort. Your turkey will be juicy and tender and flavorful throughout. There are two types of brines– wet brine and dry brine.
Below, you will find a bit about both techniques. I do both– because I like the challenge of a wet brine and the simplicity of a dry brine! The technique is different, but the results are the same. A piece of meat that has been brined has an improved ability to hold moisture. Muscle proteins are naturally dissolved by the salt in the solution, and when some of those fibers are dissolved, they lose their ability to constrict and contract while cooking. Meat that doesn’t constrict during cooking holds in more juice, which makes your bird juicier.
Wet Brine
Wet brining is a technique using a bit vat of brining liquid (a water/juice/alcohol concoction that is about 5-8% salt. You sink your bird into the bath, make sure it’s submerged, and keep it cool for 12-16 hours, but not more than 24. A wet brine makes your turkey plumper because it adds water to the muscle fibers, and it also allows the seasoning to better penetrate the meat. You’ll need a bucket, ice, a cooler or fridge space (or live in a cold climate), brine materials, and a bit of elbow grease to deeply sanitize everything when you’re done.
Dry Brine
On the other hand, a dry brined bird is a bit more simple and straightforward, with far fewer dishes. Rather than plunking your bird in a salt bath, you give it a good rub with a highly-salted mixture, and then the same thing happens– the salts help dissolve some muscle fibers making for more tender meat. You don’t add moisture in this technique, but the brine helps your bird maintain the natural moisture it came with. The supplies are more simple, bird, brine, and a pan that fits in the fridge. If you have a metal rack for that pan, great. And if you don’t, a coil of aluminum foil will keep it from sitting in liquid in the pan. A dry brine can be on the bird for 12 to 24 hours, and you don’t need to rinse- so make your dry brine flavorful!

Give it a Shot
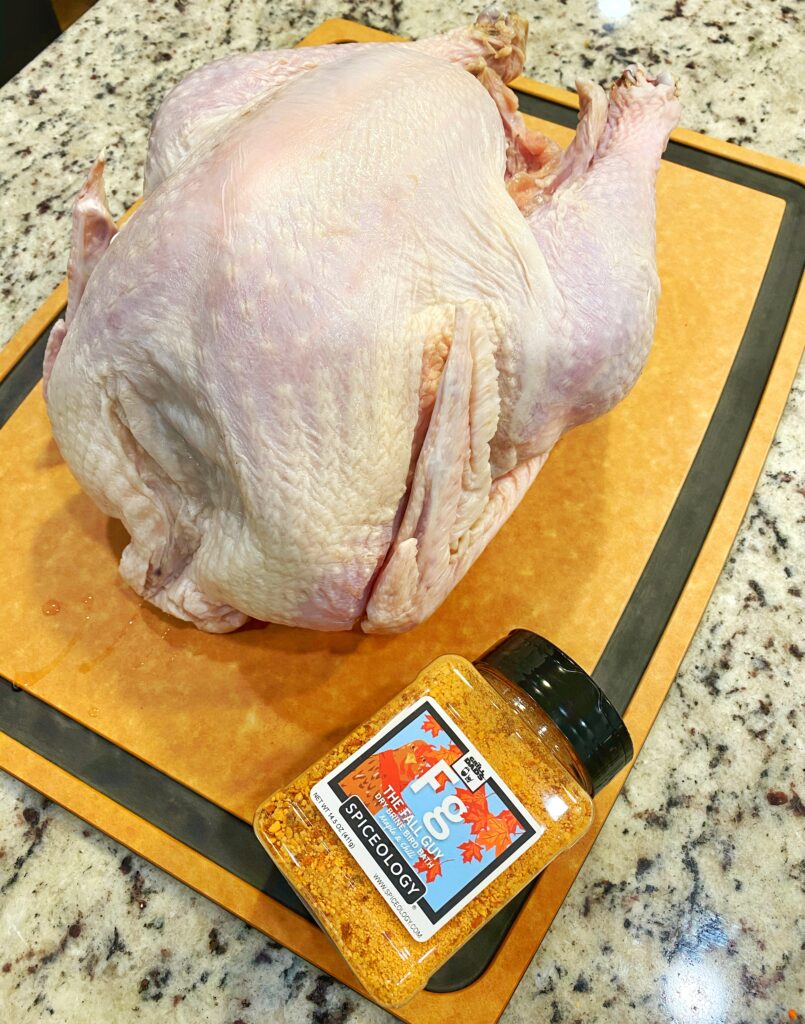
For this cook, I found a 13# organic bird in the bottom of my freezer and figured I’d give it a shot.
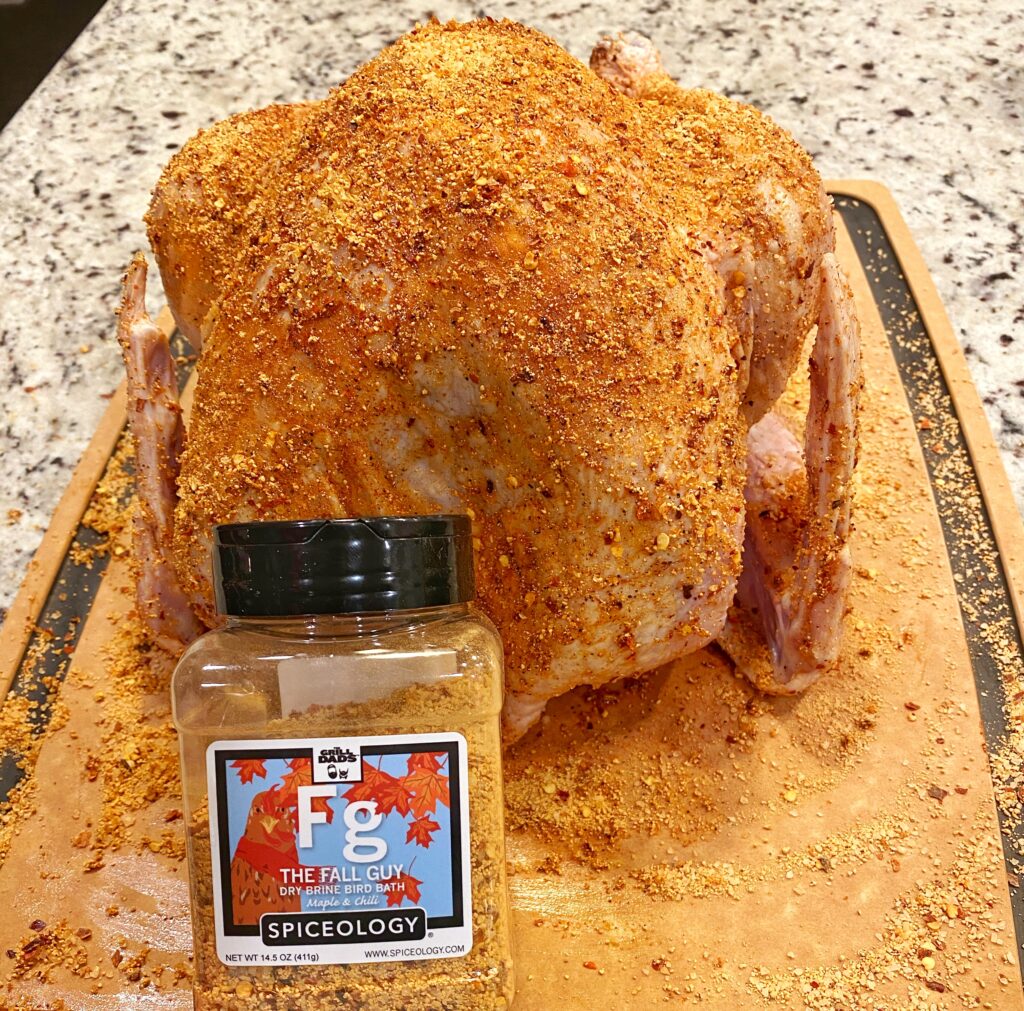
We let it defrost for 48 hours in the fridge, then removed the bags inside and gave it a rinse. I coated it generously with The Fall Guy dry brine by the Grill Dads, which is made by my partner company, Spiceology. The rub is full of maple and chili flavors, and is specially designed to be used for this kind of application. I seasoned it all over the outside (bottom too) and then a bit on the inside.
Then I set the bird in a Cambro pan and snaked a big piece of aluminum foil in a rope on the bottom of the pan and put the bird on top. Then, much to my wife’s chagrin, I put it UNCOVERED in the fridge overnight. I think this bird was in the fridge for about 18 hours total.
The next day, I fired up the Traeger to 350* and took the bird out of the fridge while the grill heated up. I put the bird, breast side down, on my cutting board and cut the backbone out of the turkey. I just used a sharp pair of kitchen scissors to do this.
Then flip it over on the board and push down super hard to crack the breast bone. It should flatten out pretty well, which will make for even cooking. This is called spatchcocking and once you’ve done it with a chicken or turkey, you’ll be amazed at how evenly and consistently you can cook your birds! Check out this blog with more detail about the technique.
I brushed the turkey all over with melted herb butter from Banner Butter, and placed it in the grill. I put a thermometer probe in the breast and let the turkey cook. One more brush with butter halfway through and 2.5 hours later, we had an amazingly juicy turkey.


Dry Brined Turkey
Equipment
- kitchen shears
- pastry brush
- pan and rack or aluminum foil
Ingredients
- 11-15 pound turkey
- 1 cup dry brine
- 1/2 cup melted compound herb butter
Instructions
- Once the turkey is defrosted, remove gravy bag and any residual ice and rinse the bird.
- Then season liberally with dry brine rub. Coat the outside and a bit on the inside. Set in a pan with a rack or aluminum foil snake and place uncovered in the fridge for at least 12 hours.
- After 12+ hours, remove the bird, cut out the backbone and flatten it.
- Brush with melted butter and place in Traeger grill preheated to 350°.
- Grill until internal temperature hits 160-165° and juices run clear.


[…] meal on the table and inform everyone that it’s cooked on your Traeger. In addition to the Dry Brined Turkey mentioned in this blog post, there are lots of other recipes you can include in your Traegered […]