With St. Patrick’s Day just around the corner, now is your chance to start thinking about items for your holiday menu (and the days surrounding it!) as you celebrate this day of luck. Lucky for you, this recipe for Quick Pastrami on the Traeger is super simple– using just a few ingredients– including a store bought pre-brined brisket flat– and will have your tastebuds dancing an Irish jig after a smoky cook on the Traeger.

PASTRAMI- BUT MAKE IT QUICK
This recipe for pastrami on the Traeger is about as easy and quick as it can possibly be. By starting with a store bought pre-brined brisket flat (sold in mass quantities this time of year), the bulk of the work is done for you, and now all you have to do is give it a good seasoned crust and a nice smoke on the Traeger. A normal brine for pastrami will require no less than 24 hours in the fridge– and often is recommended for longer– and in the world of quick family meals cooked up in the backyard, nobody has time for brining a brisket yourself. Cut a corner and purchase the packaged one, and your pastrami is ⅔ there.
WHAT CUT TO BUY
For this recipe, we picked up two brisket flats from our local grocery store, which were labled as “corned beef.” This time of year, in your meat department, you’ll see tons of these brisket pieces in a liquid-filled bag with a packet of pickling seasoning. Corned beefs like you will get at the grocery store are brined ahead of time (and are sold with some brine still in the bag) and will be tender and ready to cook.
We chose brisket flat pieces for our recipe (about 2-3 pounds per piece) because we knew that the marbling would be consistent, a small fat cap would be present and at the end of the cook, it would be a fairly uniform sized piece that would cut well on the deli slicer. You could use a brisket point if you’d prefer, knowing that the sliced pieces at the end would be less consistently shaped.

HOW TO PREPARE IT
To begin with, you want to remove the brisket pieces from the packaging and rinse it under cool water. The way corned beef is sold in the store, it’ll be in a salty brine slurry in the bag, and that is ultimately too much salt for this dish. If you have time and want to, you could soak the rinsed brisket piece in a pan or dish of cool water for about 20 minutes, changing the water once, to draw out some of the additional salt. But in the interest of time, we stuck with rinsing it well, patting it dry with a paper towel and getting to seasoning.
SEASONING YOUR QUICK PASTRAMI
The biggest difference between corned beef and pastrami is the way it is seasoned. Both are brined first, and then cooked. And corned beef is typically then boiled in water with pickling spices until it is nearly fall-apart tender. On the other hand, pastrami is brined and then seasoned with a heavy coating of strongly-flavored herbs and spices– and then smoked until tender and sliced. For our quick pastrami on the Traeger, we jump over the brining process by purchasing it already-brined and head right to the seasoning and smoking steps.
GARLIC JUNKIE FOR THE WIN
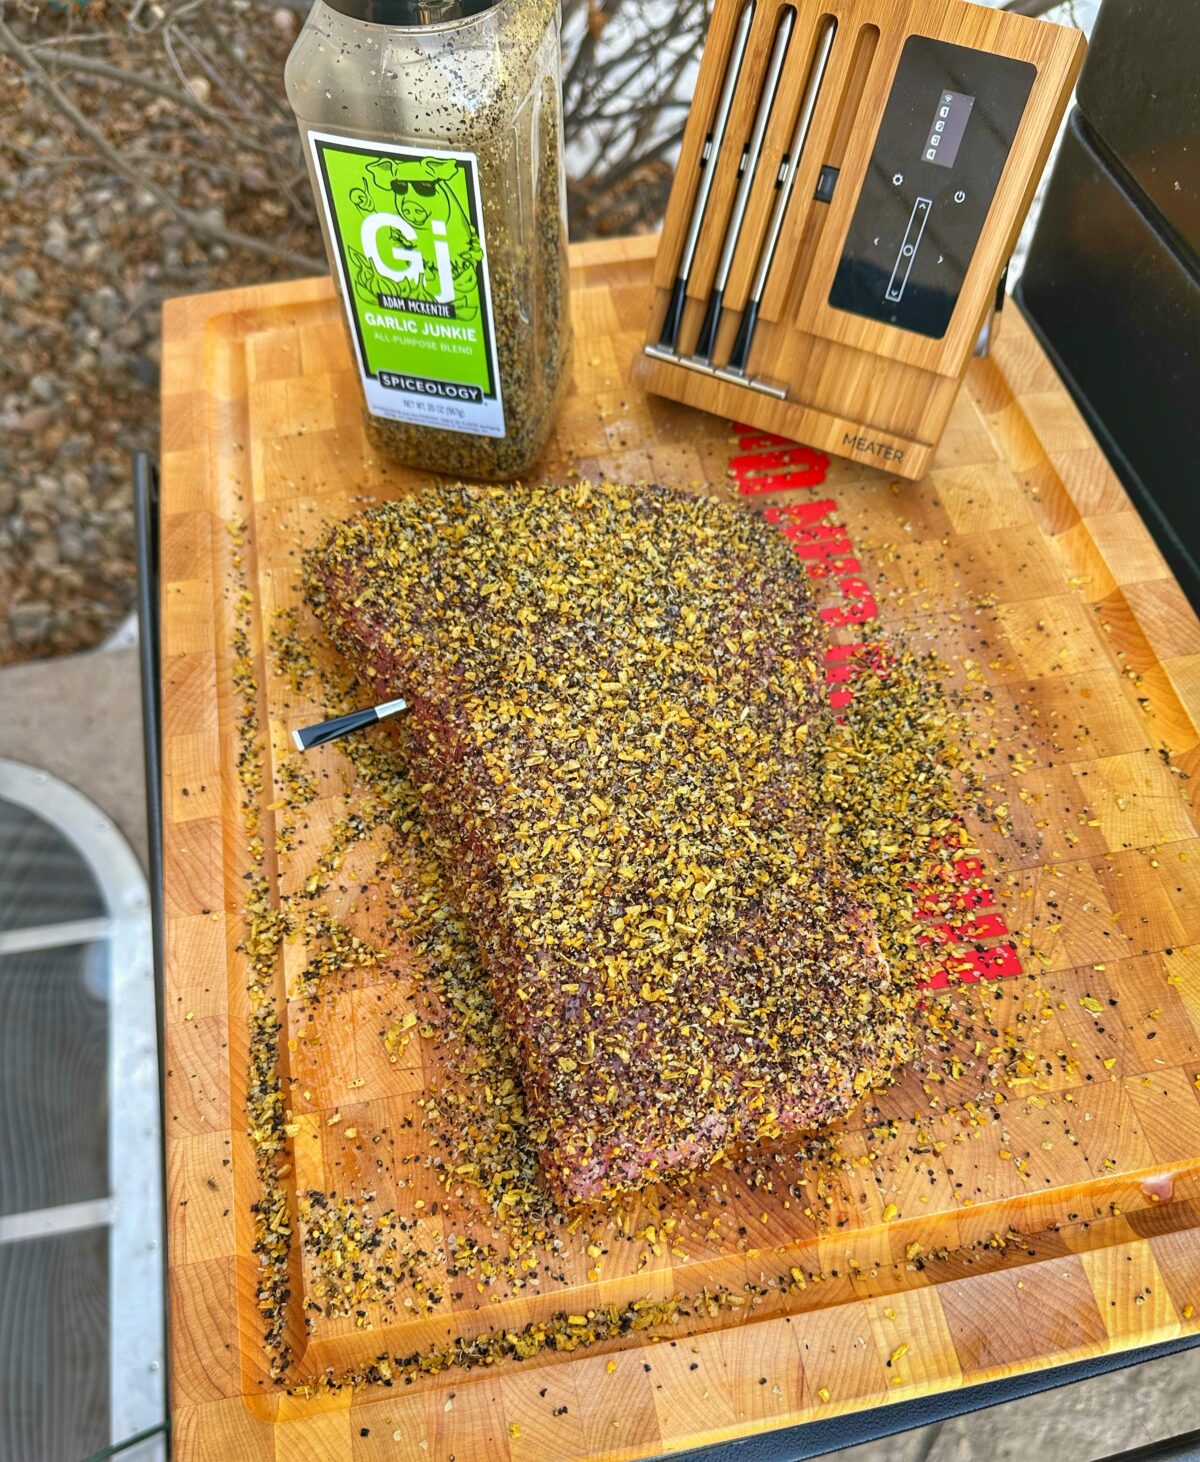
My quick pastrami on the Traeger uses only one ingredient for the seasoned crust– my Garlic Junkie Seasoning. It’s a blend that I created with Spiceology that really highlights the flavor of garlic and a variety of spices and herbs that go with and compliment it. Garlic Junkie has a spicy bite to it due to the large amounts of garlic in the blend, alongside loads of cracked black pepper.
All of this makes it ideal for pastrami seasoning– and we loaded it on thickly. No binder was necessary– just a brined brisket that had been patted dry and a whole lotta’ garlic love.
SMOKING YOUR PASTRAMI
We placed the seasoned brisket flats directly on the grates of our Traeger Ironwood XL (new new!) and smoked it at 225* for several hours. When the internal temperature of the meat reached 165* I wrapped each piece in a big piece of aluminum foil with a splash of beef broth in the wrap.
Back on the grill they went at 300* until the internal temperature read about 200*. If you want the meat to be slightly more tender, you can cook it to 205* or so in this step.
I pulled the wrapped brisket flats from the grill and vented the foil for about 15 minutes to let a lot of the steam and heat out of the package. Then wrapped them up tightly again in the foil (or you could use plastic wrap) and put them in the fridge overnight or for about 12 hours. This helps the crust set, the juices in the meat redistribute and makes the briskets perfect for slicing the next day.
PRIMARY INGREDIENTS
- Corned beef brisket flat
- My Garlic Junkie Seasoning
- Beef broth
WHY COOKING QUICK PASTRAMI ON THE TRAEGER WORKS
While most pastrami is smoked (and let’s be honest– store bought), this recipe for quick pastrami on the Traeger utilizes the amazing backyard grill that we know and love to create a memorable holiday dish for your family to love. Pastrami is definitely not just for St. Patrick’s day though, and you could make this quick pastrami on the Traeger any time of year to use as cold cuts for sandwiches like reubens that your family will love.
By starting with a pre-brined store bought brisket flat, the longest step of the process of making pastrami is skipped and you can jump right to smoking. Doing it on the Traeger is fun and approachable and you are nearly guaranteed amazing results.
STEP-BY-STEP
- Preheat your Traeger grill to 225*.
- Unwrap the corned beef brisket from the packaging.
- Rinse the meat under a stream of cool water to remove excess brine.
- Discard the packaging and the seasoning packet.
- Pat the brisket dry with a paper towel and place it on a cutting board.
- Season all sides of the brisket flat with a generous coating of Garlic Junkie seasoning.
- Pat the seasoning into the meat to adhere it to the brisket. You want a really thick coating.
- Allow the seasoning to sit on the meat for about 10 minutes.
- Place the seasoned brisket in the center of the preheated grill and close the lid.
- Cook the brisket in the grill at 225* for about 5 hours, until the internal temperature reaches 165*.
- Remove the meat from the grill and place it in the center of a large sheet of aluminum foil.
- Add ¼ cup of beef broth to the foil wrapper and close tightly.
- Return the wrapped meat to the Traeger and bump up the grill heat to 300*.
- Continue cooking the brisket in the grill until the internal temperature reaches about 200*– about 3 more hours.
- Once the meat hits 200*, pull it from the grill and open the aluminum foil to let some of the steam and heat escape the packaging.
- After 15-20 minutes vented, re-wrap the meat tightly and place it in the fridge overnight.
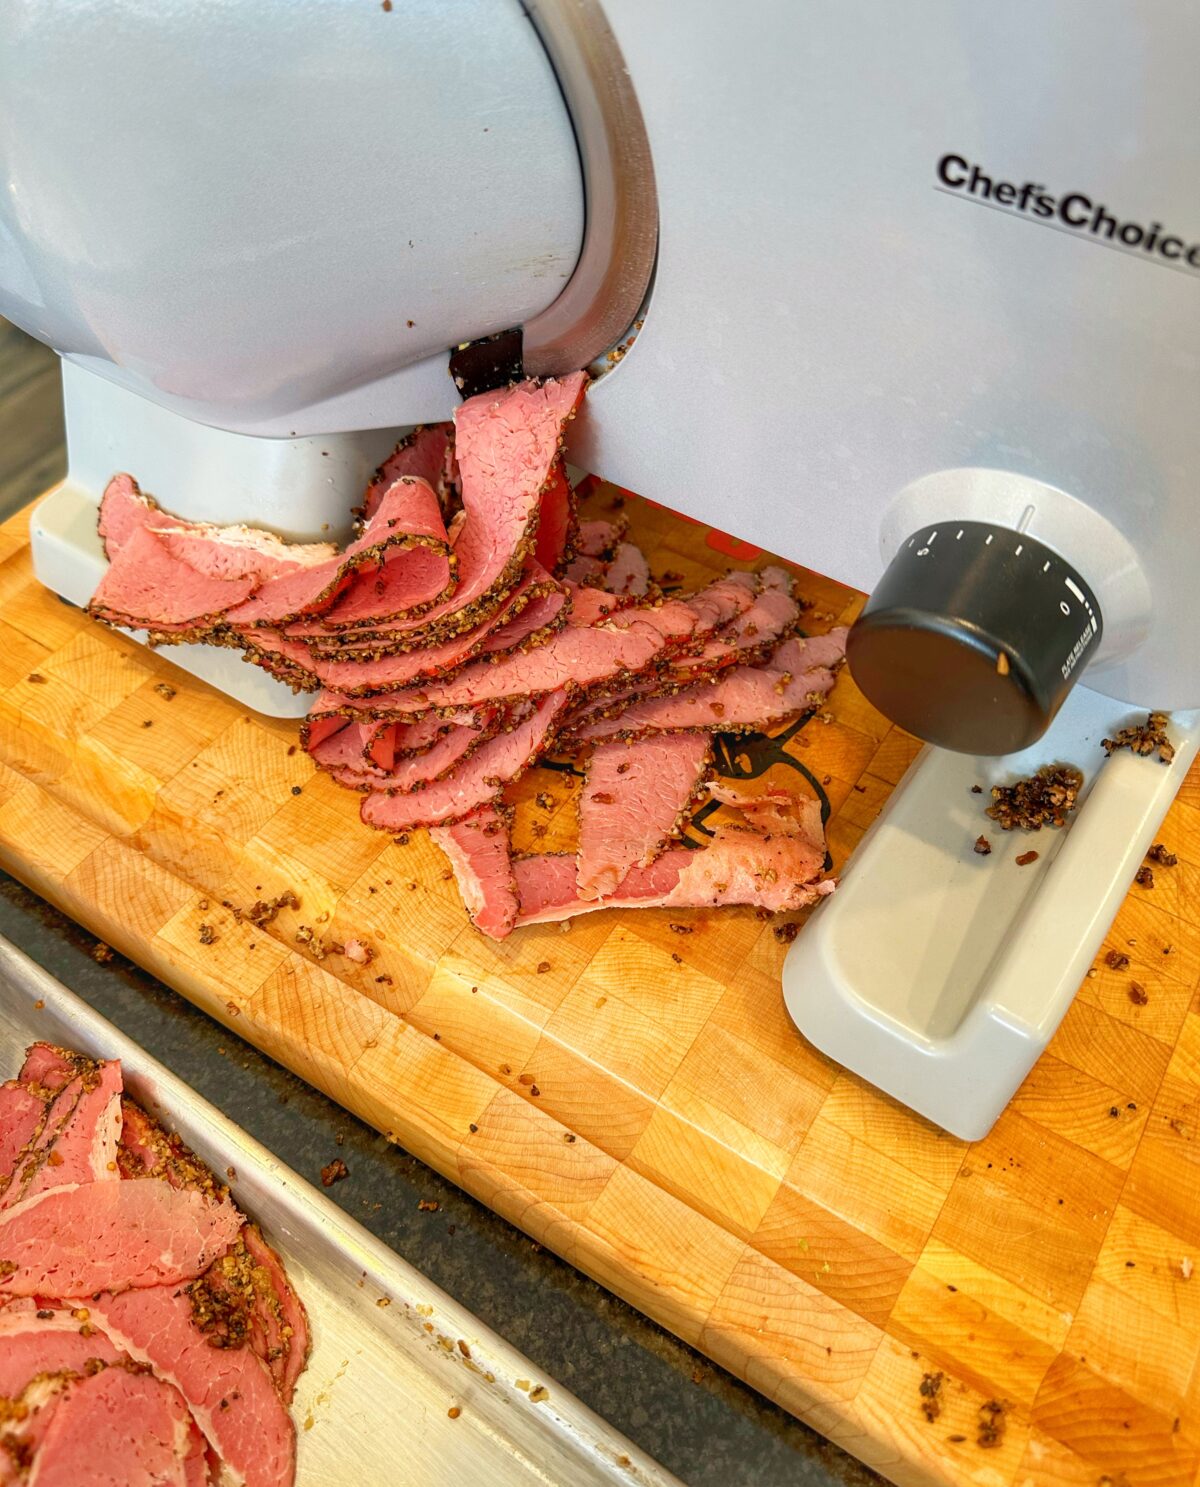
- When ready to serve, remove the quick pastrami from the foil packaging and slice thinly on a deli slicer for best results.

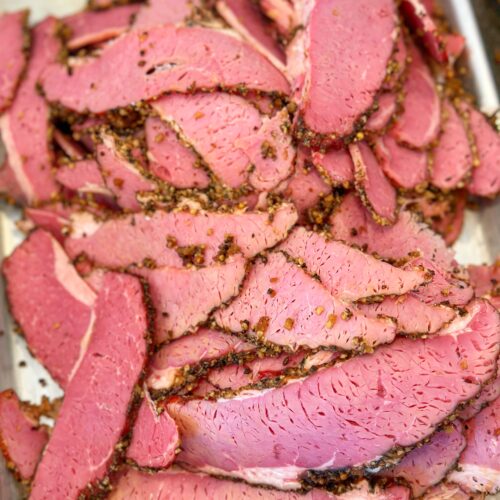
Quick pastrami in the Traeger 
Smoked pastrami


ALTERNATE RECIPES/PRODUCT LINKS
- Here are some other recipes using brisket for you to try, too. Check out the recipe for brisket and corned beef in my cookbook, which you can get here!
- Smoked beef brisket on the Traeger
- Smoked corned beef
- Tri tip smoked like a brisket
Products used in this cook:
Did you make this recipe?
I’d love to know how it turned out!
Leave a review below or snap a photo,
share it on Instagram and tag me at @ThisJewCanQue
Quick Pastrami on the Traeger
Equipment
- Traeger Ironwood XL
- My Garlic Junkie seasoning
- Aluminum foil
- Deli slicer
Ingredients
- 1 corned beef brisket flat about 3 pounds
- 1-2 cups of My Garlic Junkie Seasoning
- ¼ cup beef broth
Instructions
- Preheat your Traeger grill to 225*.
- Unwrap the corned beef brisket from the packaging.
- Rinse the meat under a stream of cool water to remove excess brine.
- Discard the packaging and the seasoning packet.
- Pat the brisket dry with a paper towel and place it on a cutting board.
- Season all sides of the brisket flat with a generous coating of Garlic Junkie seasoning.
- Pat the seasoning into the meat to adhere it to the brisket. You want a really thick coating.
- Allow the seasoning to sit on the meat for about 10 minutes.
- Place the seasoned brisket in the center of the preheated grill and close the lid.
- Cook the brisket in the grill at 225* for about 5 hours, until the internal temperature reaches 165*.
- Remove the meat from the grill and place it in the center of a large sheet of aluminum foil.
- Add ¼ cup of beef broth to the foil wrapper and close tightly.
- Return the wrapped meat to the Traeger and bump up the grill heat to 300*.
- Continue cooking the brisket in the grill until the internal temperature reaches about 200*– about 3 more hours.
- Once the meat hits 200*, pull it from the grill and open the aluminum foil to let some of the steam and heat escape the packaging.
- After 15-20 minutes vented, re-wrap the meat tightly and place it in the fridge overnight.
- When ready to serve, remove the quick pastrami from the foil packaging and slice thinly on a deli slicer for best results.

Leave a Reply