
Apple cider brined turkey brings apple, citrus, fresh herbs, and bourbon together for a holiday bird cooked on the Pit Boss. A 12-hour brine followed by an overnight air-dry in the refrigerator breaks the preparation into manageable steps before the turkey ever reaches the grill.
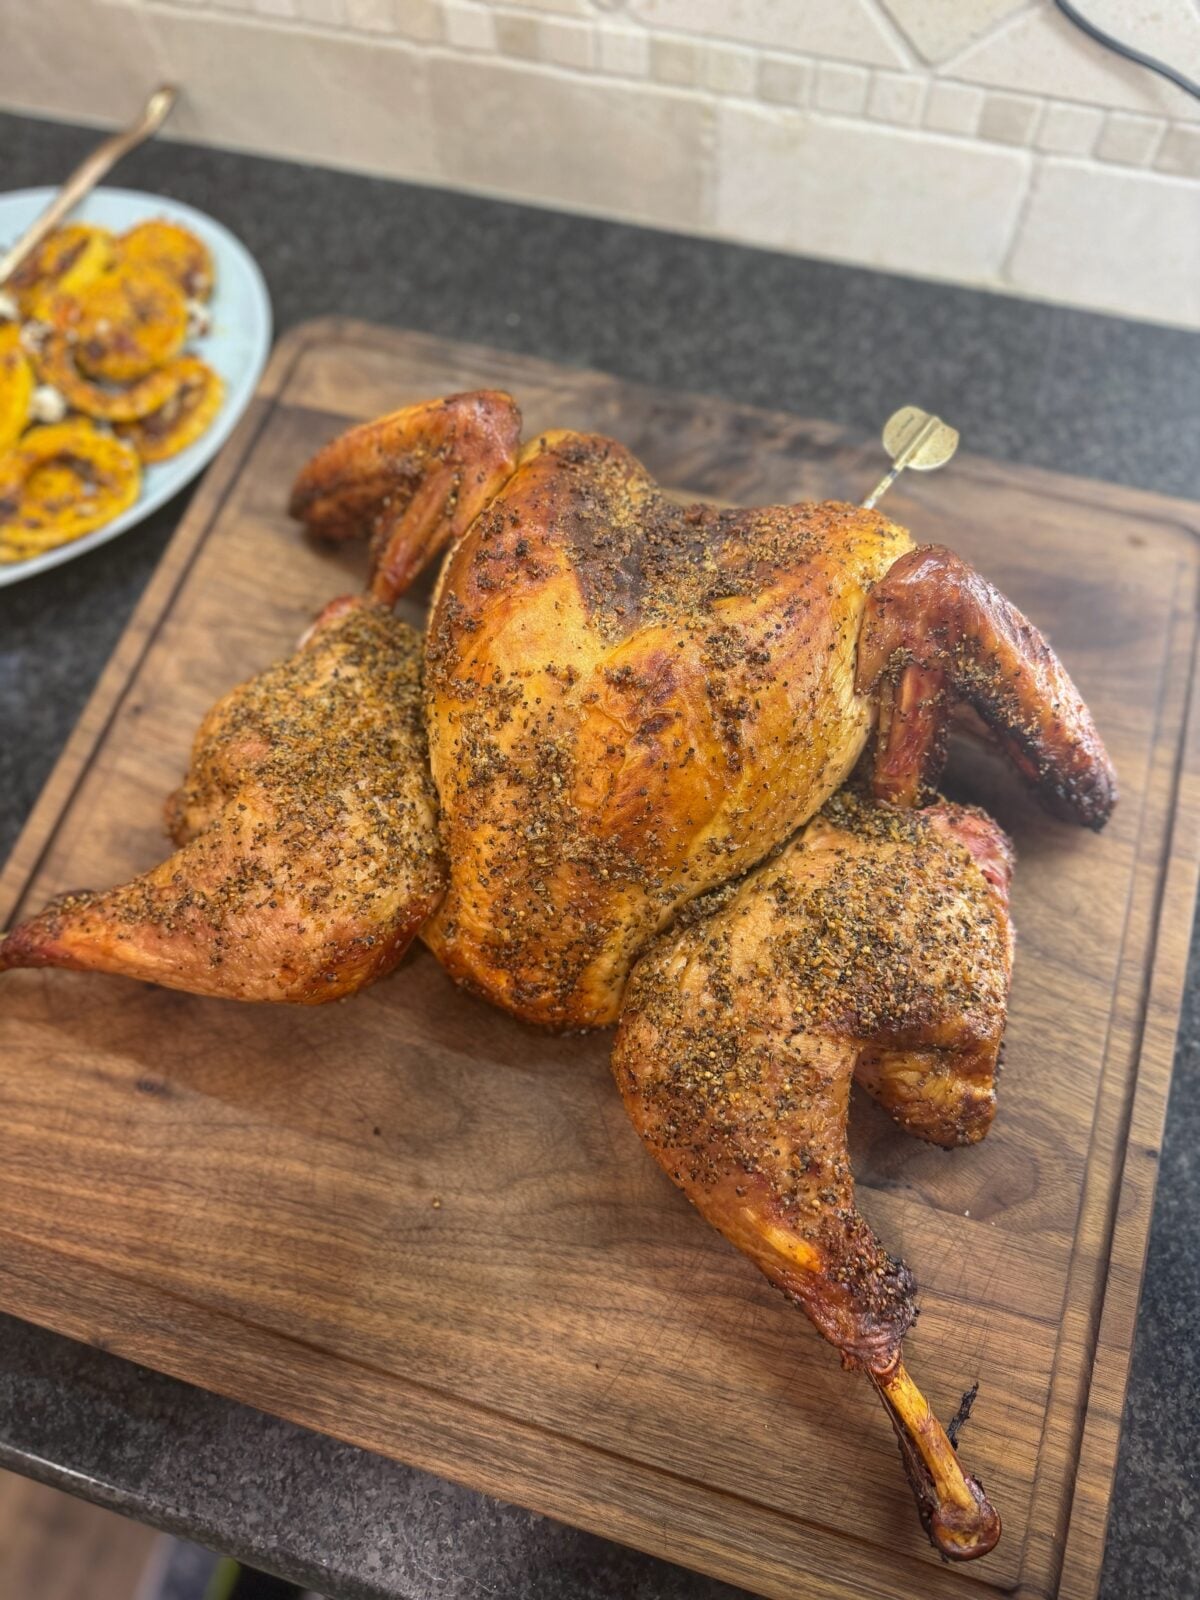
A Backyard Turkey for the Holiday Table
Thanksgiving cooking at our house starts well before anyone sits down to dinner. Between getting the turkey ready, figuring out the sides, and making room in the refrigerator, there are plenty of moving parts. As a dad and elementary STEM teacher, I appreciate a cooking plan that spreads the work across a couple of days.
For this cook, we started with a 12-pound turkey and an apple cider bourbon brine. The brine included oranges, lemon, fresh sage and thyme, salt, and Pit Boss GSP rub. After soaking for 12 hours, the turkey spent another 12 hours uncovered in the refrigerator before seasoning and cooking.
We cook in our Colorado backyard throughout the year, including when holiday weather calls for an extra layer. The Pit Boss lets us keep the turkey outside while the kitchen handles everything else. This recipe follows that same approach, with advance preparation doing much of the work.
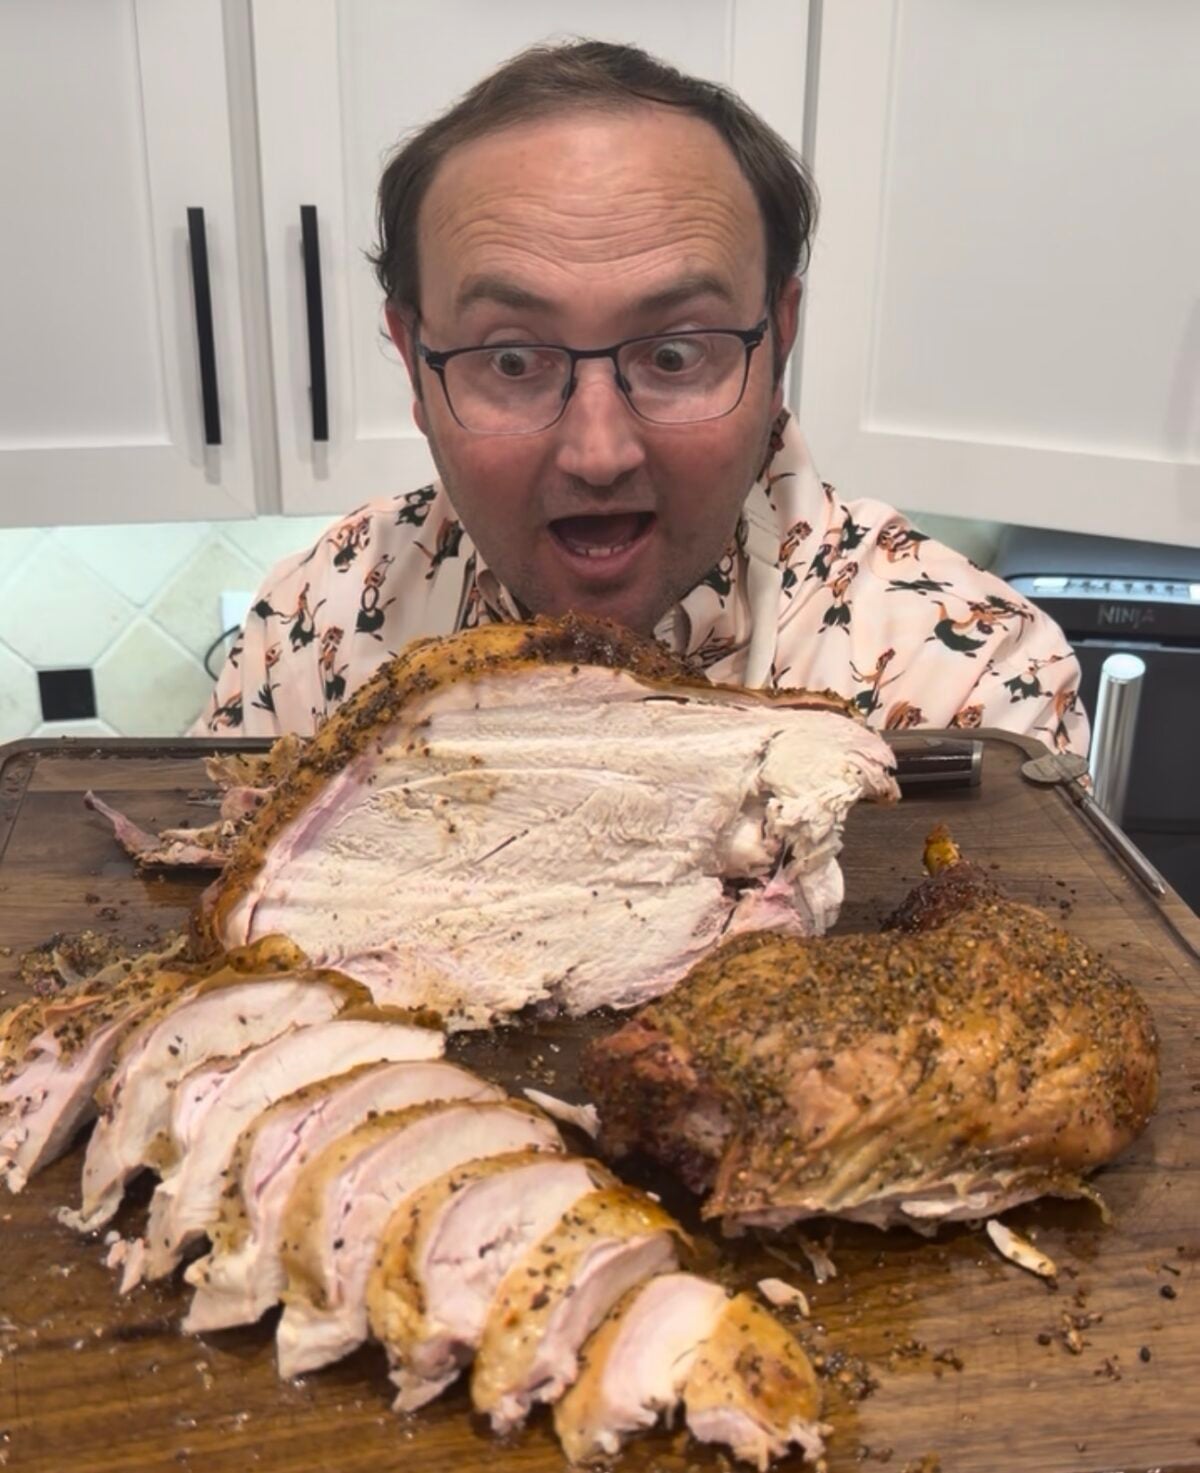
Why Make Apple Cider Brined Turkey?
Turkey has a mild flavor that works with plenty of different seasonings. Apple cider gives this recipe a fall starting point, while the citrus and herbs bring familiar holiday aromas. Bourbon adds another layer to the mixture without requiring a long list of specialty ingredients.
A properly formulated salt brine also serves a purpose beyond seasoning. Salt changes how muscle proteins behave and can help reduce moisture loss during cooking. The amount of salt in the complete mixture matters, including any salt contributed by a seasoning blend. ask.fsis.usda.gov
For our turkey, brining was one part of the preparation. We also dried the skin in the refrigerator, flattened the bird, and seasoned it before cooking. Each step addresses a different part of the finished turkey, from the flavor to the way it cooks on the grill.
Apple Cider Sets the Flavor Direction
We used half a gallon of apple cider as the starting liquid. Its apple flavor fits naturally with sage, thyme, and citrus, and it makes sense alongside the dishes already headed for a Thanksgiving table. Think stuffing, roasted squash, potatoes, and a spoonful of cranberry sauce.
Use regular apple cider for this recipe. Apple cider vinegar is a separate ingredient with a much sharper flavor and cannot replace the cider in the same amount. Check the label before pouring, especially if both bottles happen to be sitting on the counter during holiday prep.
Bourbon, Citrus, and Herbs Round It Out
The bourbon joins the cider in the brine, along with sliced oranges and lemon. Fresh sage and thyme make the mixture smell like Thanksgiving even before the turkey goes in. These are ingredients that work together without taking the turkey in an unfamiliar direction.
The exact flavor of the finished bird also depends on the seasoning applied after brining. We used Pit Boss GSP rub during the preparation, giving the recipe a savory garlic, salt, and pepper component. Keep the seasoning plan connected from beginning to end so the salt additions stay intentional.
Start With a Manageable Turkey
Our bird weighed 12 pounds, which was a practical size for handling, refrigerating, and cooking. Once you add liquid and a container, even a smaller turkey becomes a substantial item to move around. Make sure your setup fits before mixing the brine.
Read the turkey packaging before starting. Look for information about added solutions, seasoning, or prior brining, because those details affect how much additional salt makes sense. Keep the label or take a photo so you can refer back to it while finalizing your ingredients.
Get Your Equipment Ready First
Gather a food-safe brining container or sturdy brining bag, a rimmed sheet pan, a wire rack, paper towels, and a reliable thermometer. If you use a bag, place it inside a supportive container to catch leaks. A heavy bag of turkey and liquid needs a stable base.
You will also want poultry shears for spatchcocking and a board large enough to hold the turkey. Set these out before opening the package. It is much easier to organize your workspace while your hands and counters are still clean.
Ingredients for Apple Cider Brined Turkey
This recipe uses a short list of ingredients, with apple cider providing the base and the remaining additions building around it. You can prepare the citrus and herbs while gathering the brining equipment. Keep the turkey refrigerated while you work.
For our cook, the ingredients included the following.
- One 12-pound turkey
- Half a gallon of apple cider
- Water
- Bourbon
- Two teaspoons added salt
- Pit Boss GSP rub
- Oranges, sliced
- Lemon, sliced
- Fresh sage
- Fresh thyme
The two teaspoons of salt reflect the separate salt addition you see in our preparation. The GSP rub also contributes salt, so both belong in the final recipe calculations. Measure each ingredient as you assemble the mixture to make the cook easy to repeat.
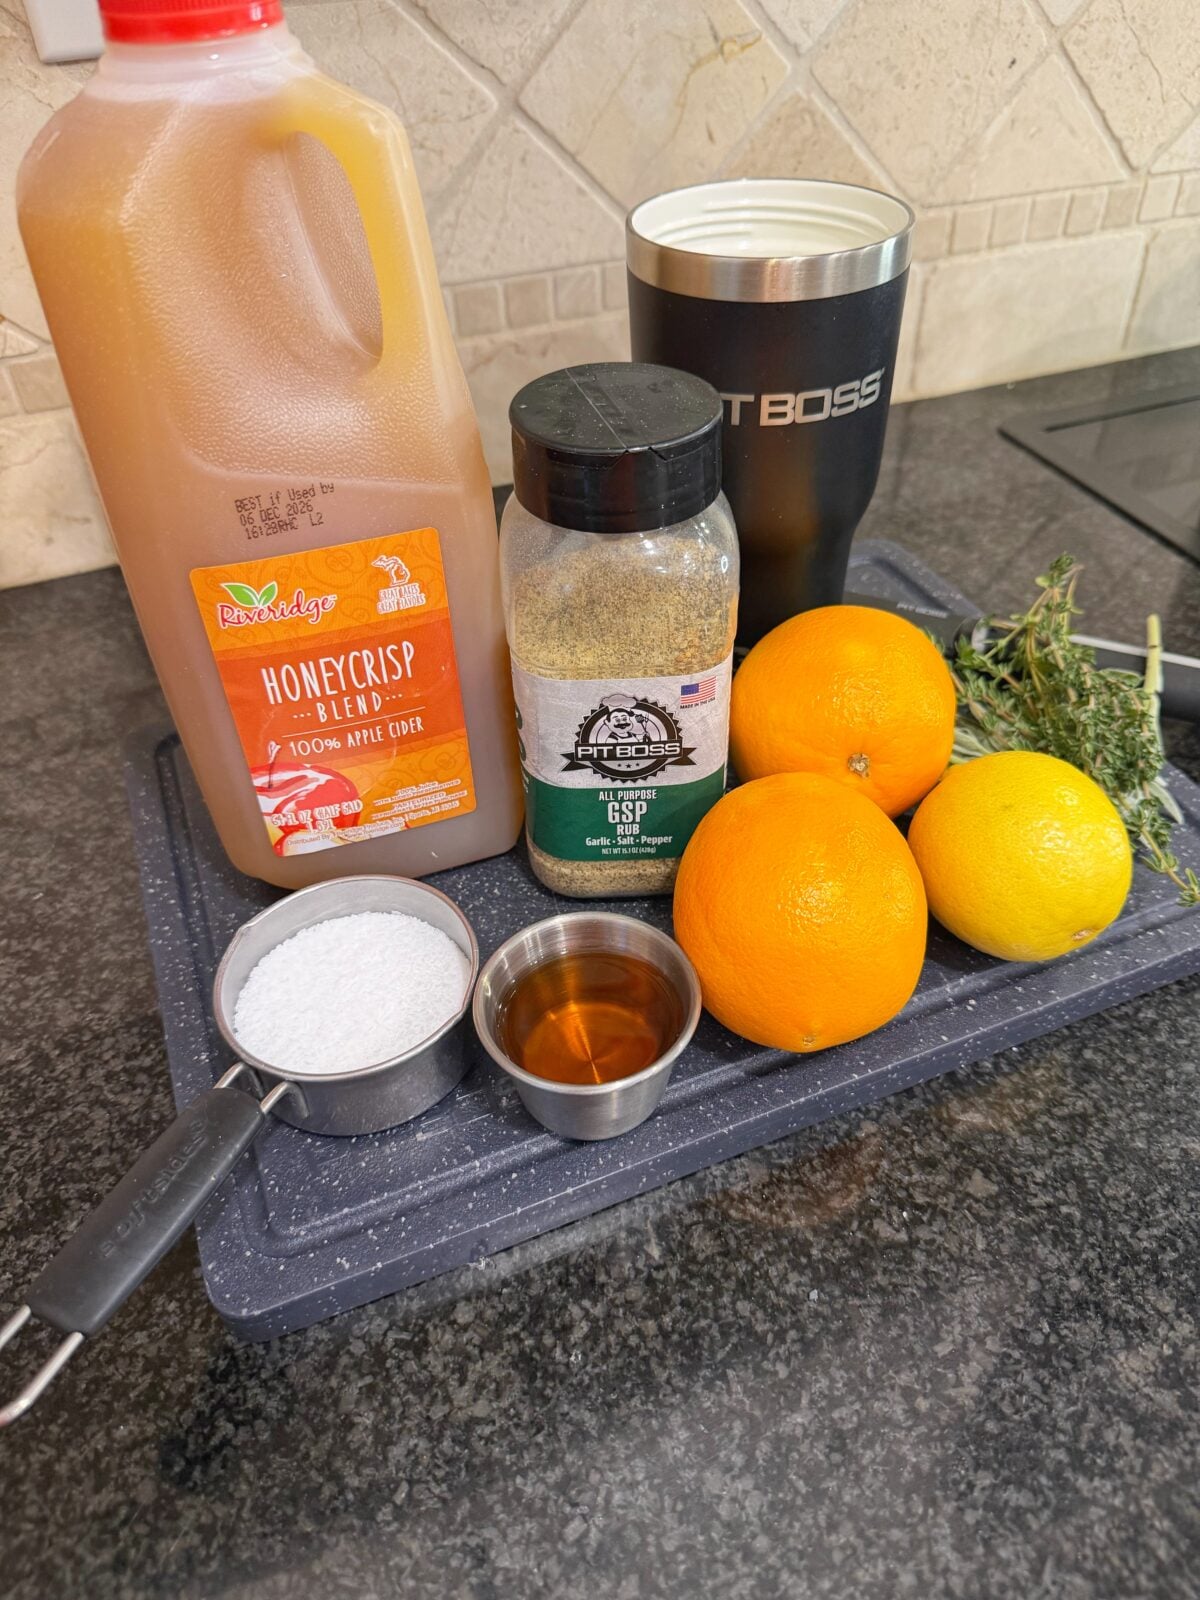
Choosing the Apple Cider
Choose an apple cider you enjoy drinking, since it supplies the main flavor of the liquid. A straightforward cider keeps the ingredient list simple. If you choose a spiced variety, check which spices it contains before adding anything else.
The cider’s sweetness will vary by brand and batch. This recipe also includes citrus, herbs, and a savory seasoning blend, so there are several flavors in the pot. There is no need to assume extra sugar belongs in the mixture simply because many turkey brines include it.
Preparing the Citrus and Fresh Herbs
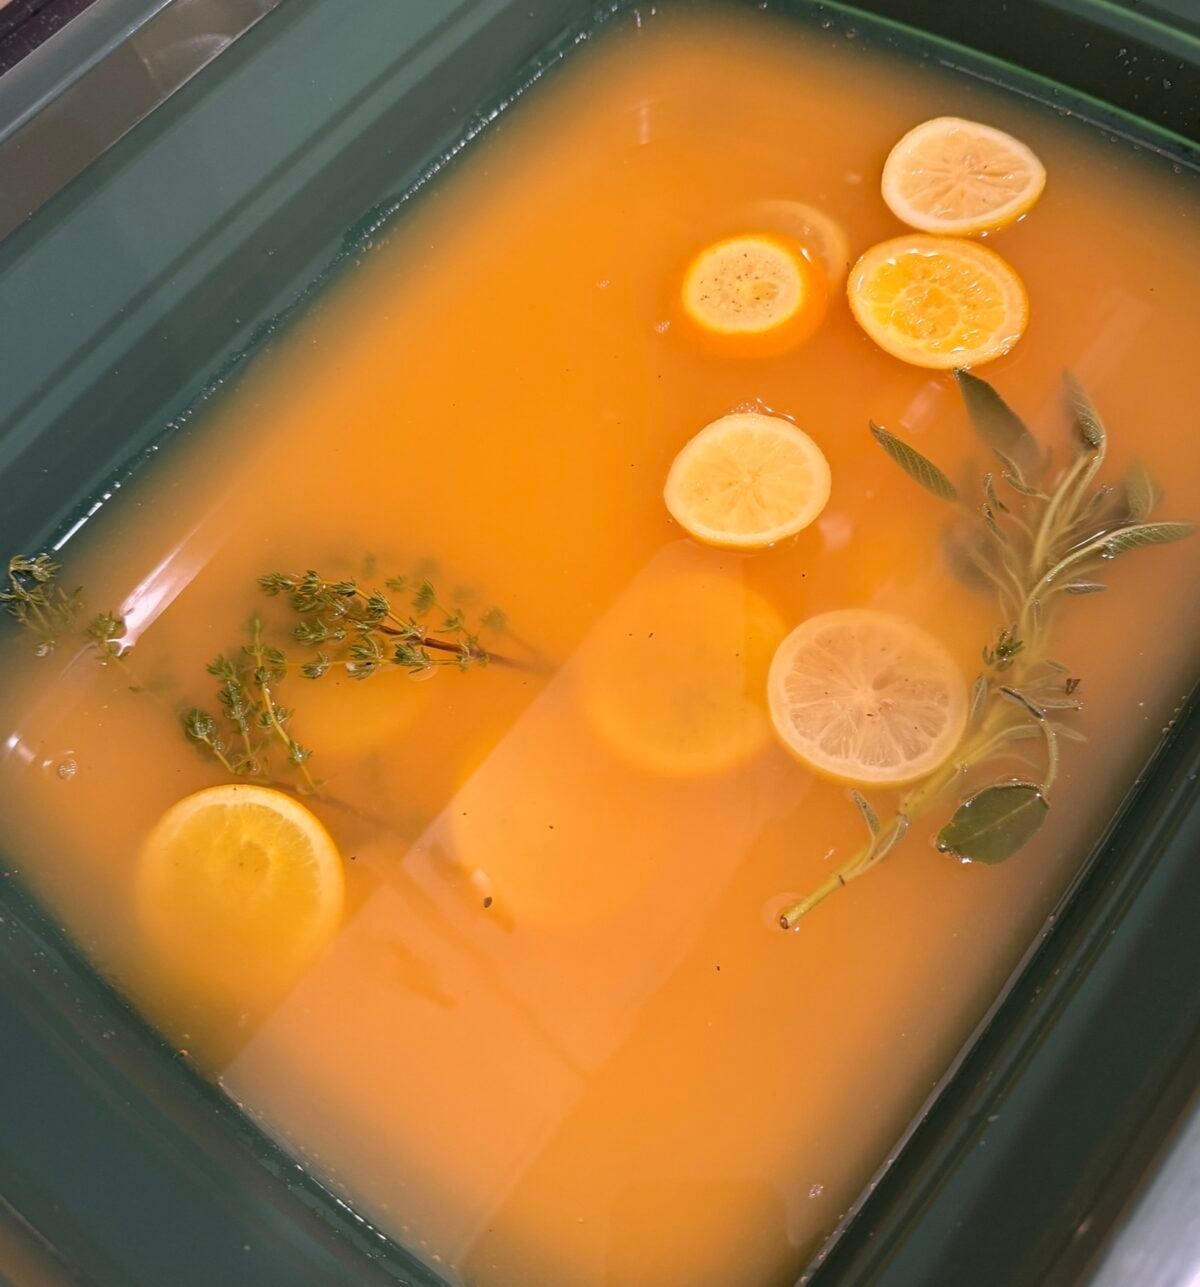
Slice the oranges and lemon so they distribute easily through the brine. Keeping them in slices also makes it simple to move them around when turning the turkey. The citrus pieces can settle against different parts of the bird during the soak.
Fresh sage and thyme can go into the mixture as sprigs. You do not need to finely chop everything for a liquid brine. Give the herbs a quick check, remove any damaged pieces, and have them ready beside the pot.
How to Prepare the Apple Cider Brine
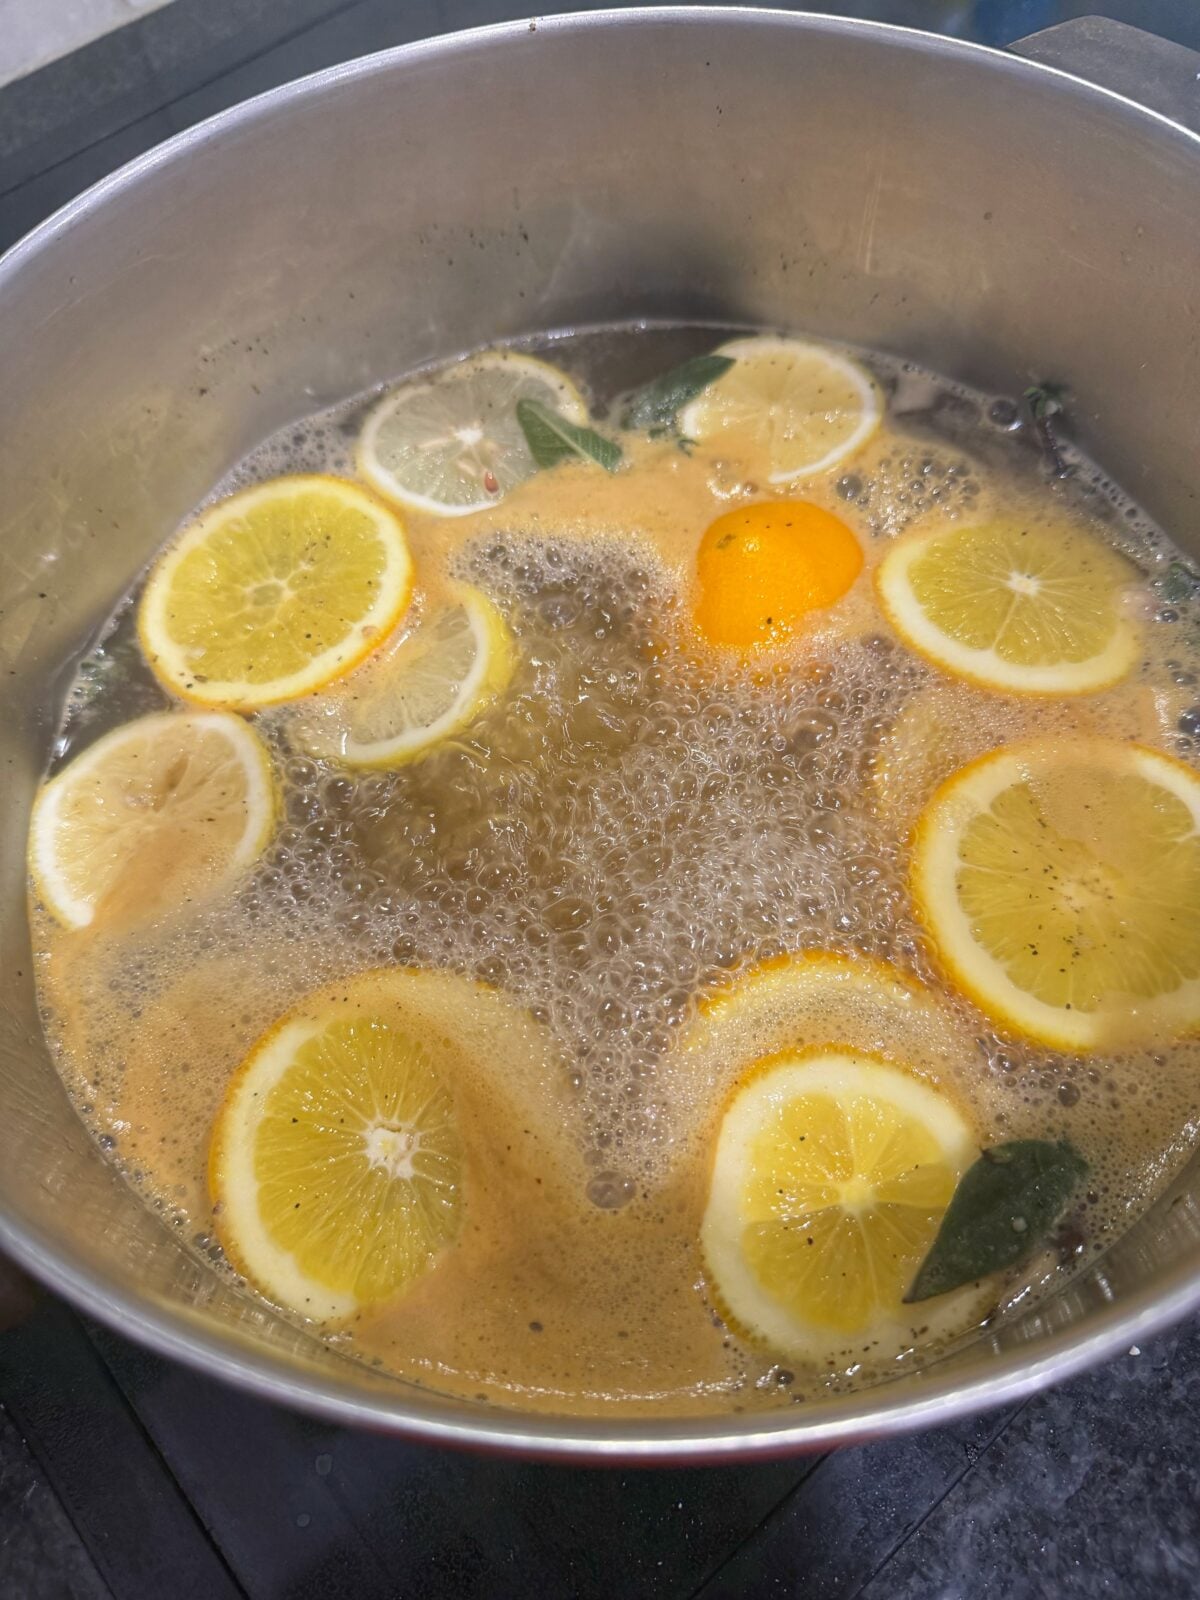
Combine the cider, water, measured salt, GSP rub, bourbon, citrus, and herbs in a large pot. Stir thoroughly so the seasonings distribute through the liquid. If you heat the mixture to dissolve the salt and combine the ingredients, allow time for it to cool afterward.
The brine must be chilled to 40°F or below before adding the turkey. Keep the turkey and brine at that temperature throughout the soak, using a thermometer to verify the conditions. A refrigerator provides a controlled place for this step.
Choose a Container That Fits
The container affects how much liquid you need to surround the turkey. A wide vessel leaves more empty space around the bird, while a fitted brining bag can hold the liquid closer. Check the fit before committing to your setup.
Adding extra water changes the salt concentration as well as the flavor. Record the total water used, including any ice that melts into the mixture. Those details are especially helpful when turning a backyard cook into a recipe someone else can follow.
Brine the Turkey for 12 Hours
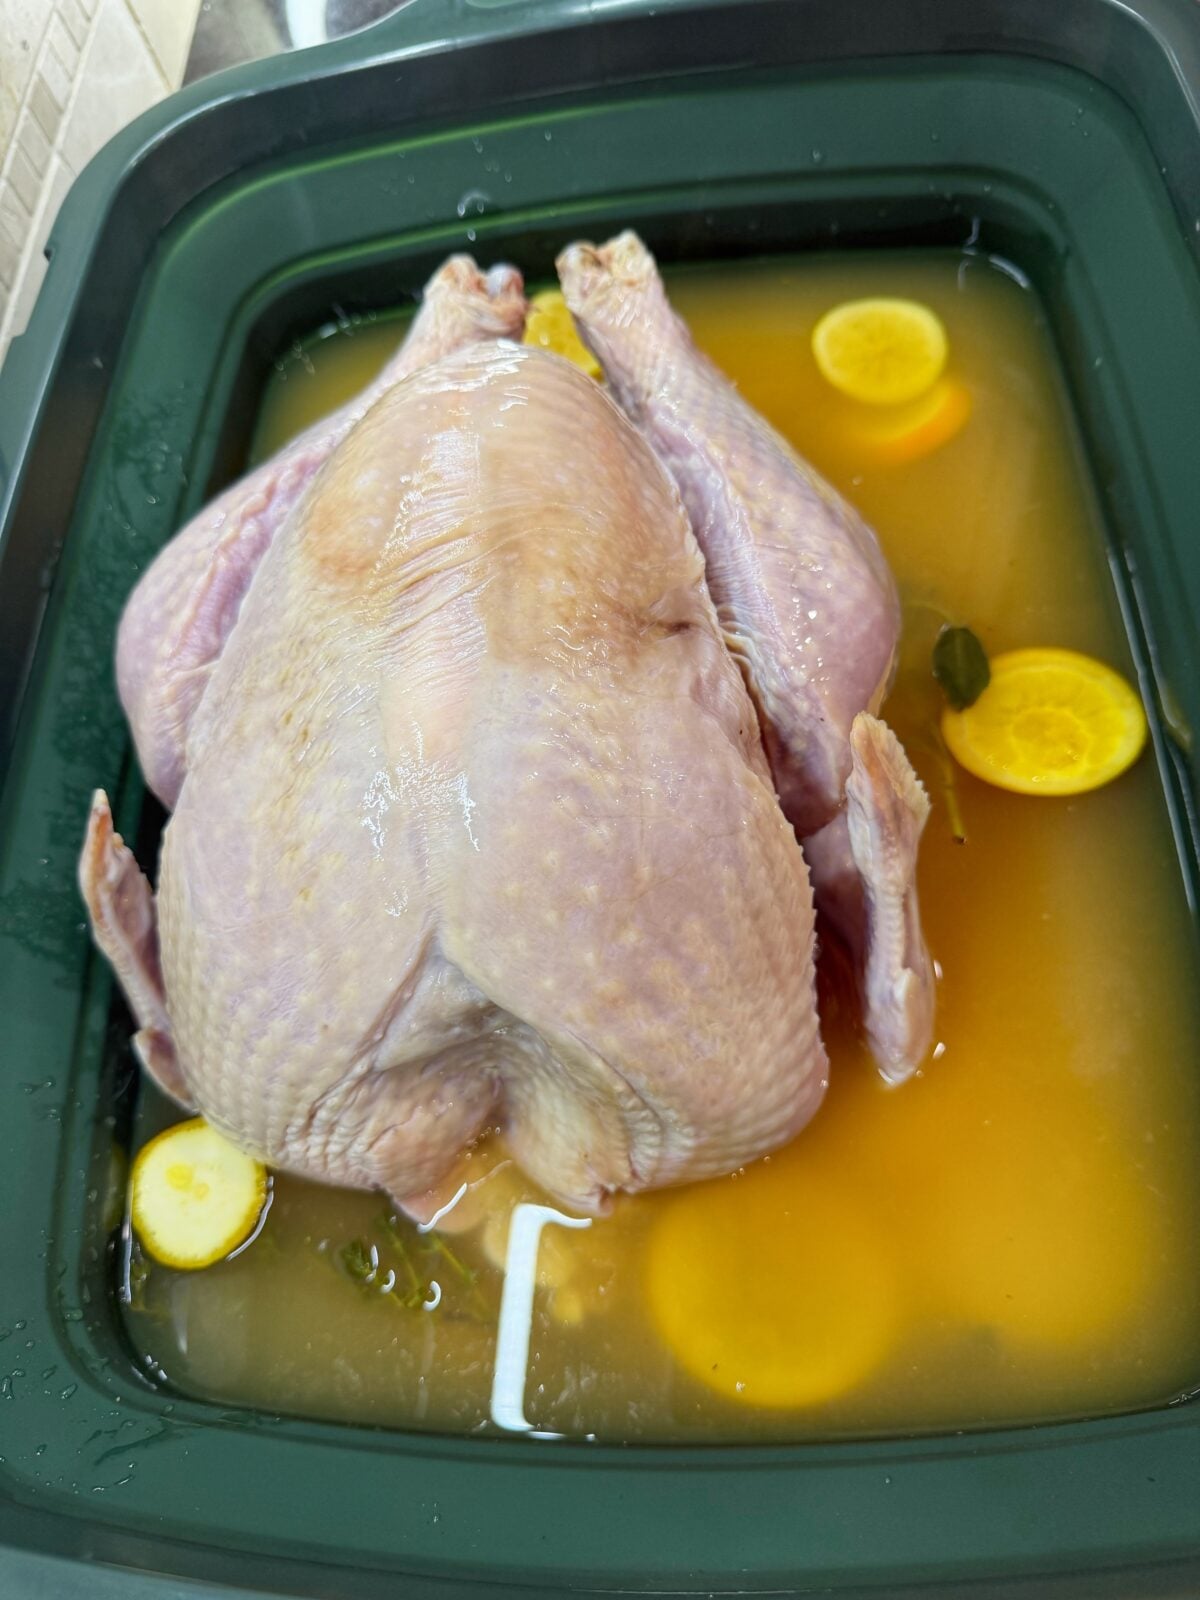
For this apple cider brined turkey, we used a 12-hour soak. That gave us a clear preparation window and left another 12 hours for drying the bird in the refrigerator. Build both steps into your schedule before deciding when to begin.
Place the turkey in the chilled brine and position it so the liquid surrounds it as fully as possible. Cover the container or securely close the bag, then return it to the refrigerator. Make sure the shelf can support the weight.
Flip the Turkey at Six Hours
Halfway through the brining time, turn the turkey over. For our schedule, that meant a flip at the six-hour mark. Reposition the citrus and herbs as needed, then cover the turkey and return it to the refrigerator.
Set a phone reminder when you start the soak. It is an easy detail to forget when dinner, homework, and the rest of the evening are happening around you. A quick reminder keeps the process moving without having to watch the clock.
Give the Brine Its Own Preparation Window
One reason I like this schedule is that the work comes in short stretches. You mix the brine, refrigerate the turkey, turn it once, and come back when the soak is finished. Most of the time is hands-off.
That works well for a teacher’s schedule and a busy family kitchen. You can plan the active steps around the rest of the day. The important part is knowing when each stage begins and ends before you start.
Air-Dry the apple cider brined turkey in the Refrigerator for 12 Hours
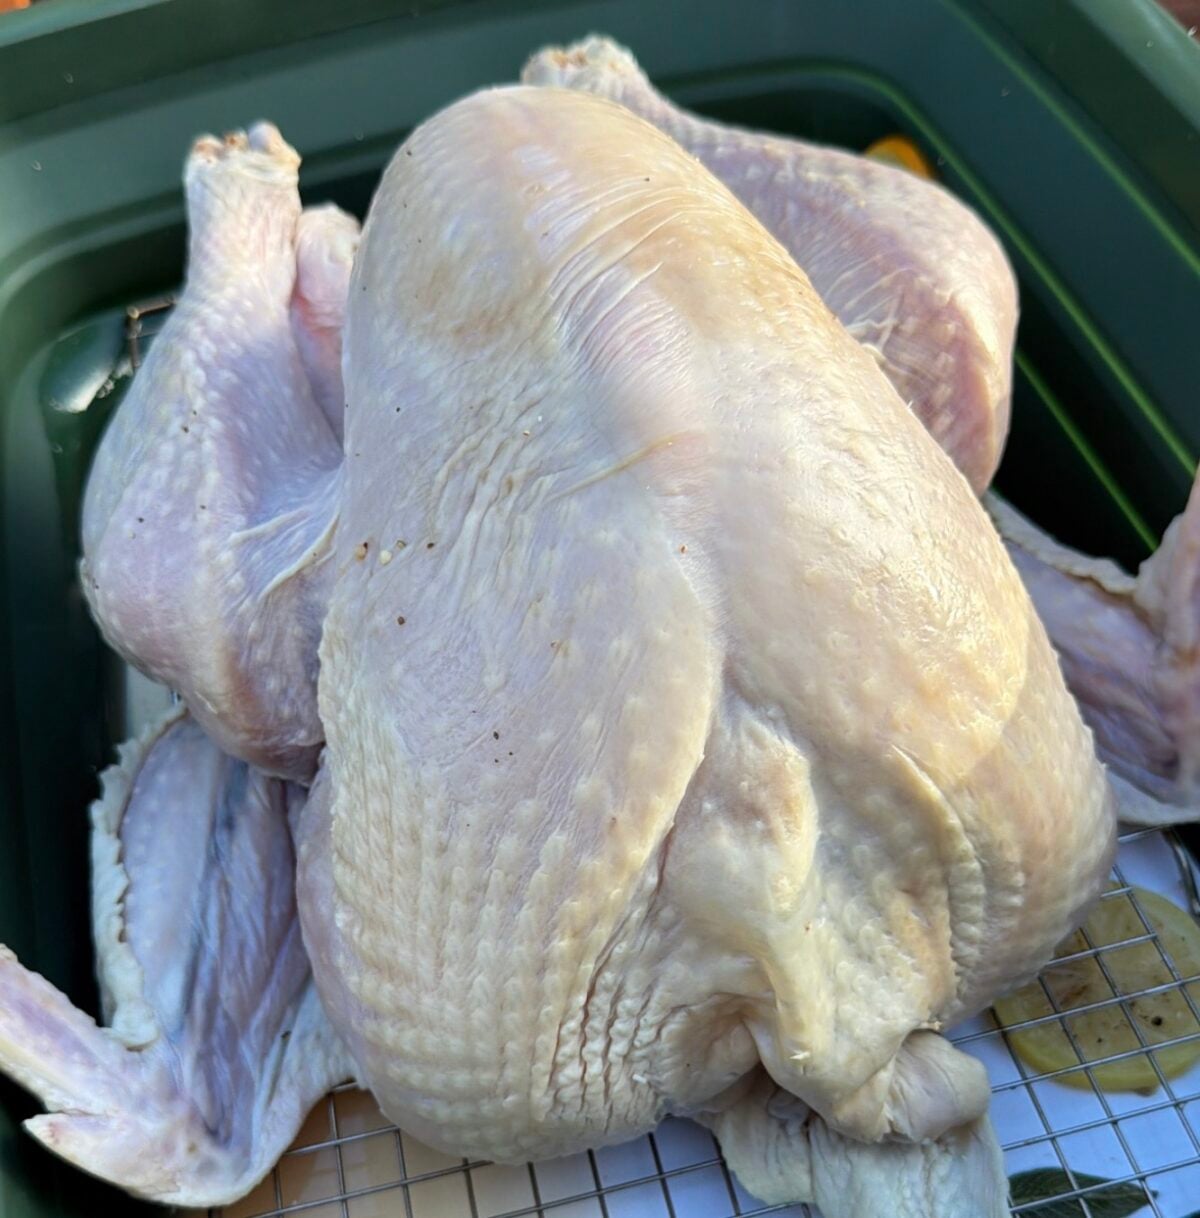
After the brine, remove the turkey and discard the used liquid. Pat the bird thoroughly dry with paper towels, including folds and areas where liquid collects. Transfer it to a wire rack set over a rimmed sheet pan.
Our turkey then spent 12 hours uncovered in the refrigerator. The rack lets air reach more of the surface while the sheet pan catches drips. Position it where it will fit securely, with other food protected from contact.
Why the Drying Step Matters
A turkey comes out of a wet brine with moisture on its surface. Giving that surface time to dry helps prepare the skin for browning during cooking. It is an additional step worth allowing space for in the schedule.
Dry skin alone does not determine the final texture. Grill temperature, airflow, seasoning, and the way the bird sits on the grate also play a role. Think of the refrigerator rest as preparation for the cooking stage.
Plan Refrigerator Space Ahead
Before a holiday meal, refrigerator space can disappear quickly. A turkey on a rack needs room above it as well as a sturdy shelf underneath. Check the height and width of your tray before loading the refrigerator with sides and desserts.
I like having the brining container and drying tray ready before beginning either stage. You can check the fit once and move on. That small amount of planning saves rearranging a full refrigerator while holding a turkey.
Spatchcock the Turkey for the Pit Boss
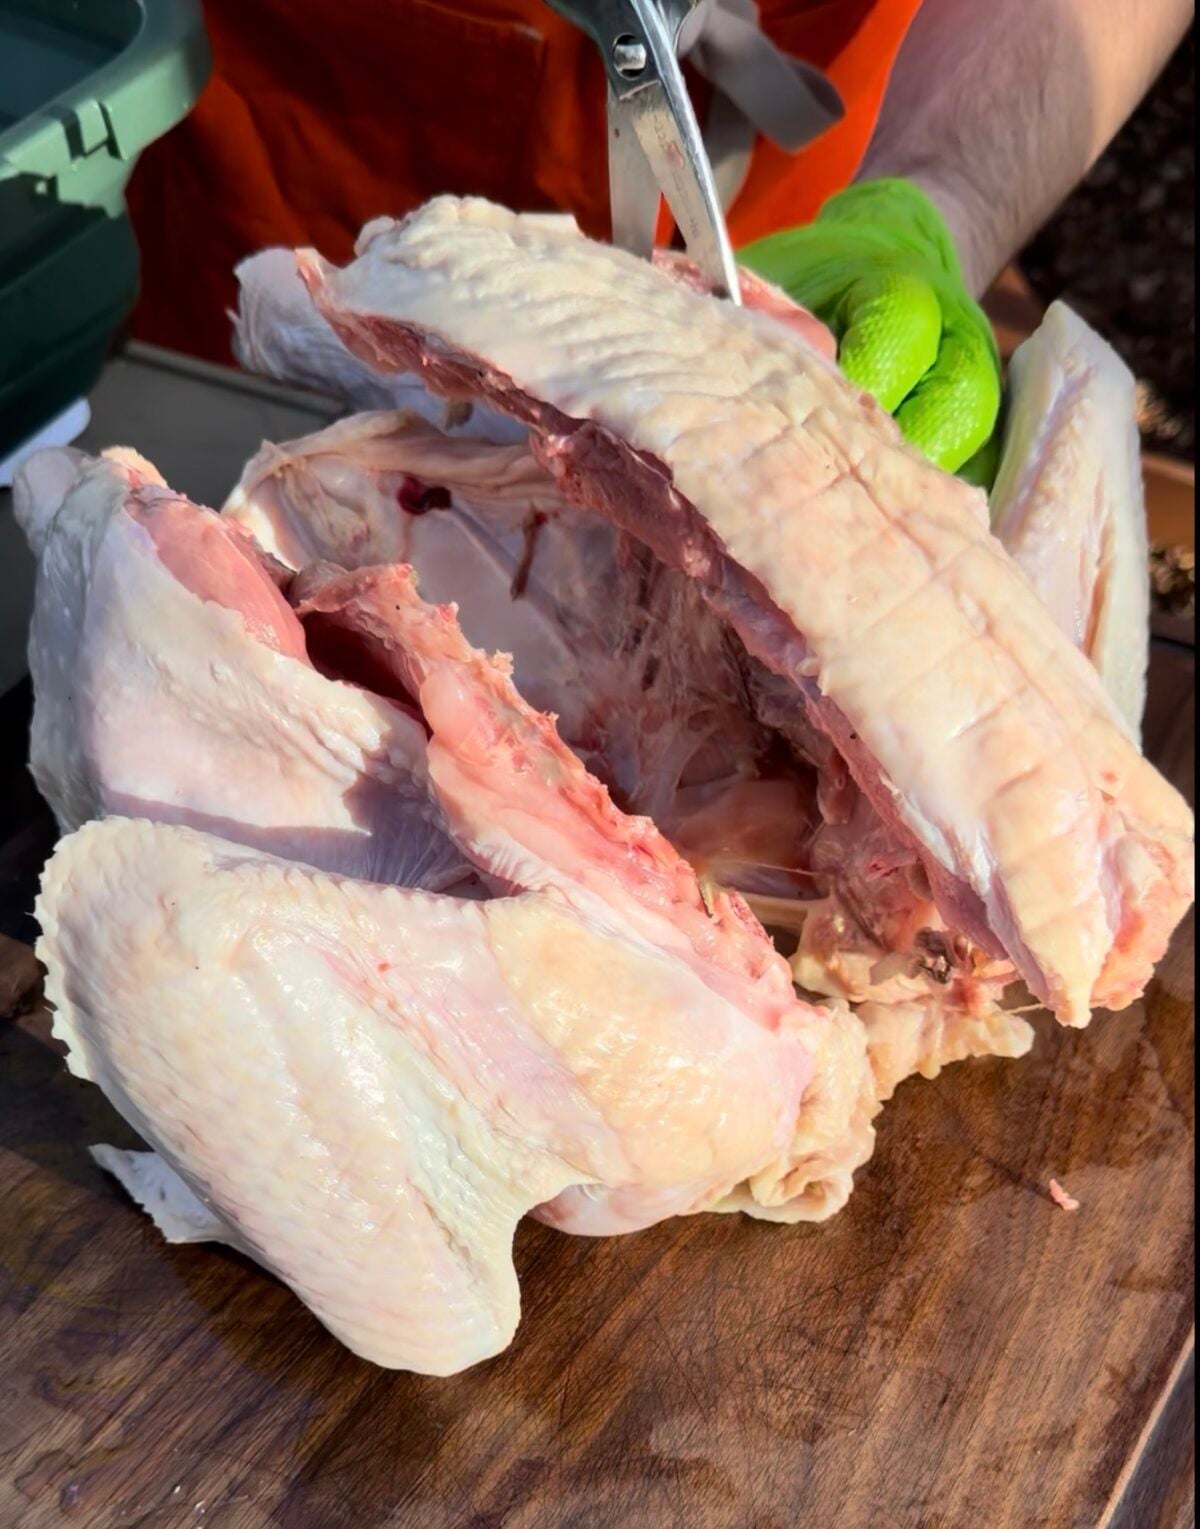
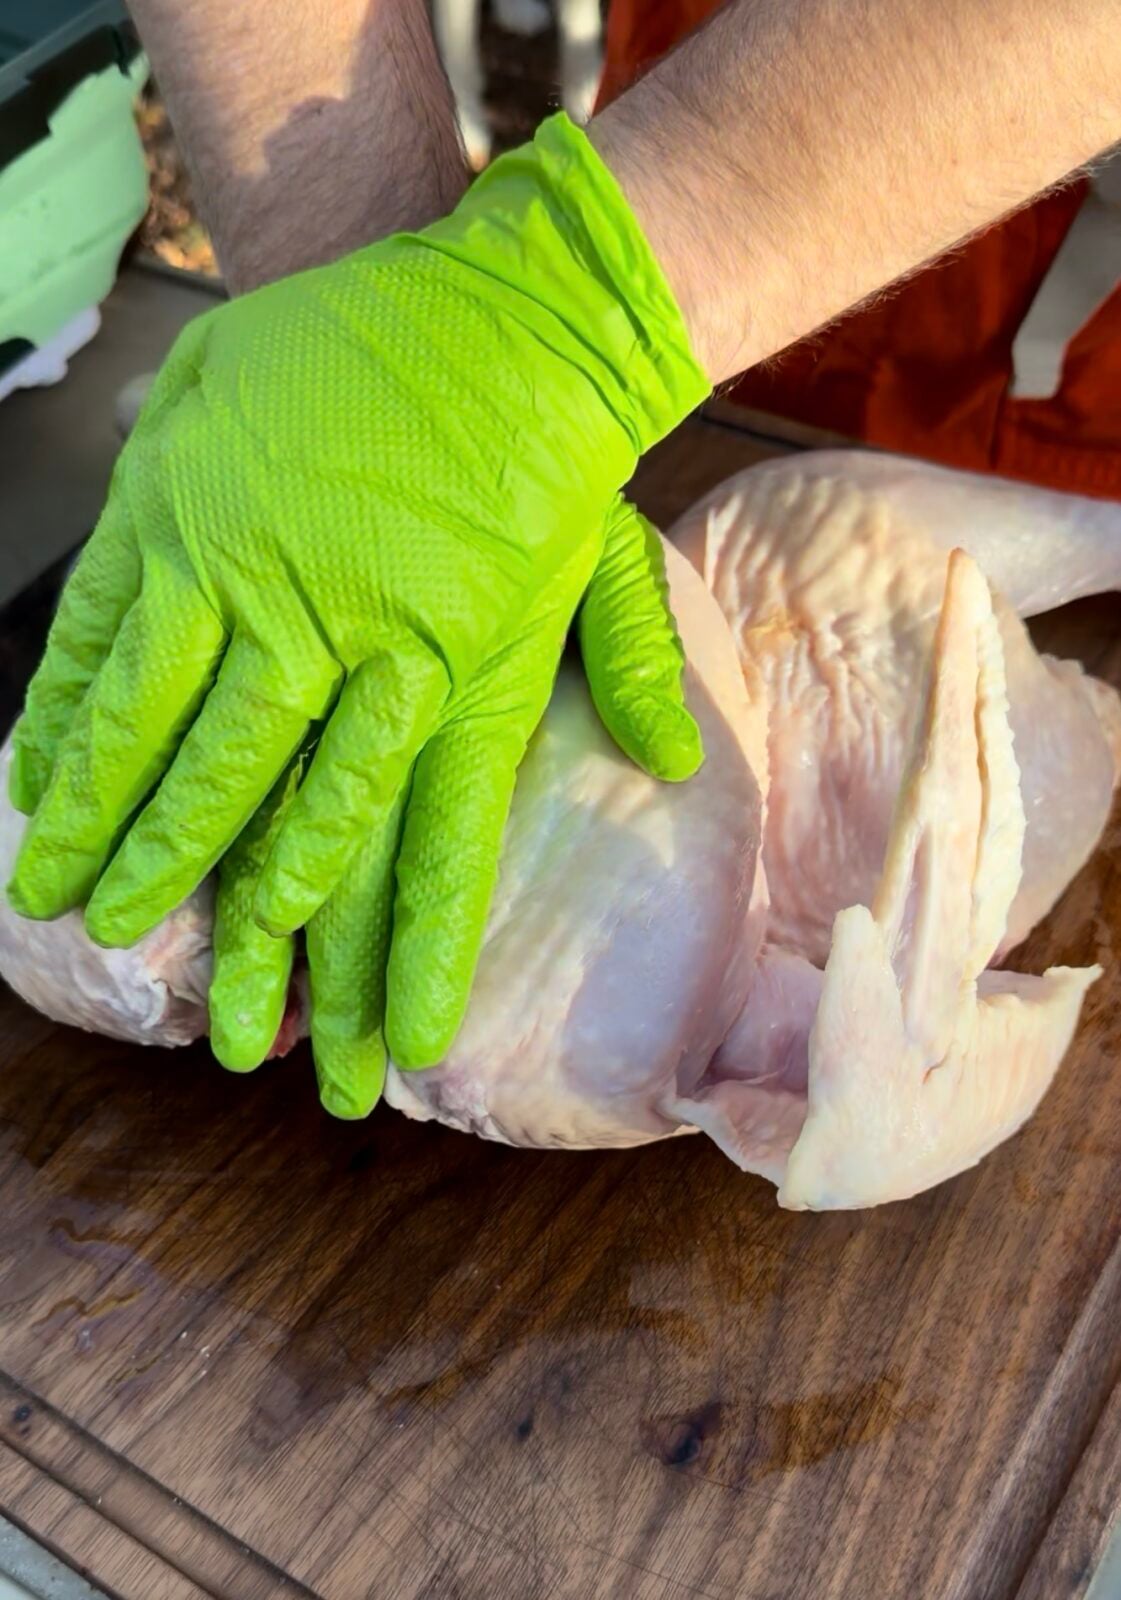
The turkey in this cook was spatchcocked, meaning the backbone was removed so the bird could lie flat. This changes its shape on the grill and makes the breast, legs, and thighs easier to access. It also gives you a broad surface for seasoning.
Use sturdy poultry shears to cut along both sides of the backbone, then remove it. Open the bird, turn it breast-side up, and press firmly to flatten it. Work on a stable board with enough room around the turkey.
Make Sure the Flattened Bird Fits
A spatchcocked turkey takes up more width than a whole upright bird. Check the usable cooking area on your Pit Boss before you get started. You want room for the turkey without pressing it against the edges of the cooking chamber.
Arrange the legs and wings so the bird sits as evenly as possible. That makes it easier to position temperature probes and check different areas later. It also helps keep the turkey stable when transferring it off the grill.
Season Above and Beneath the Skin
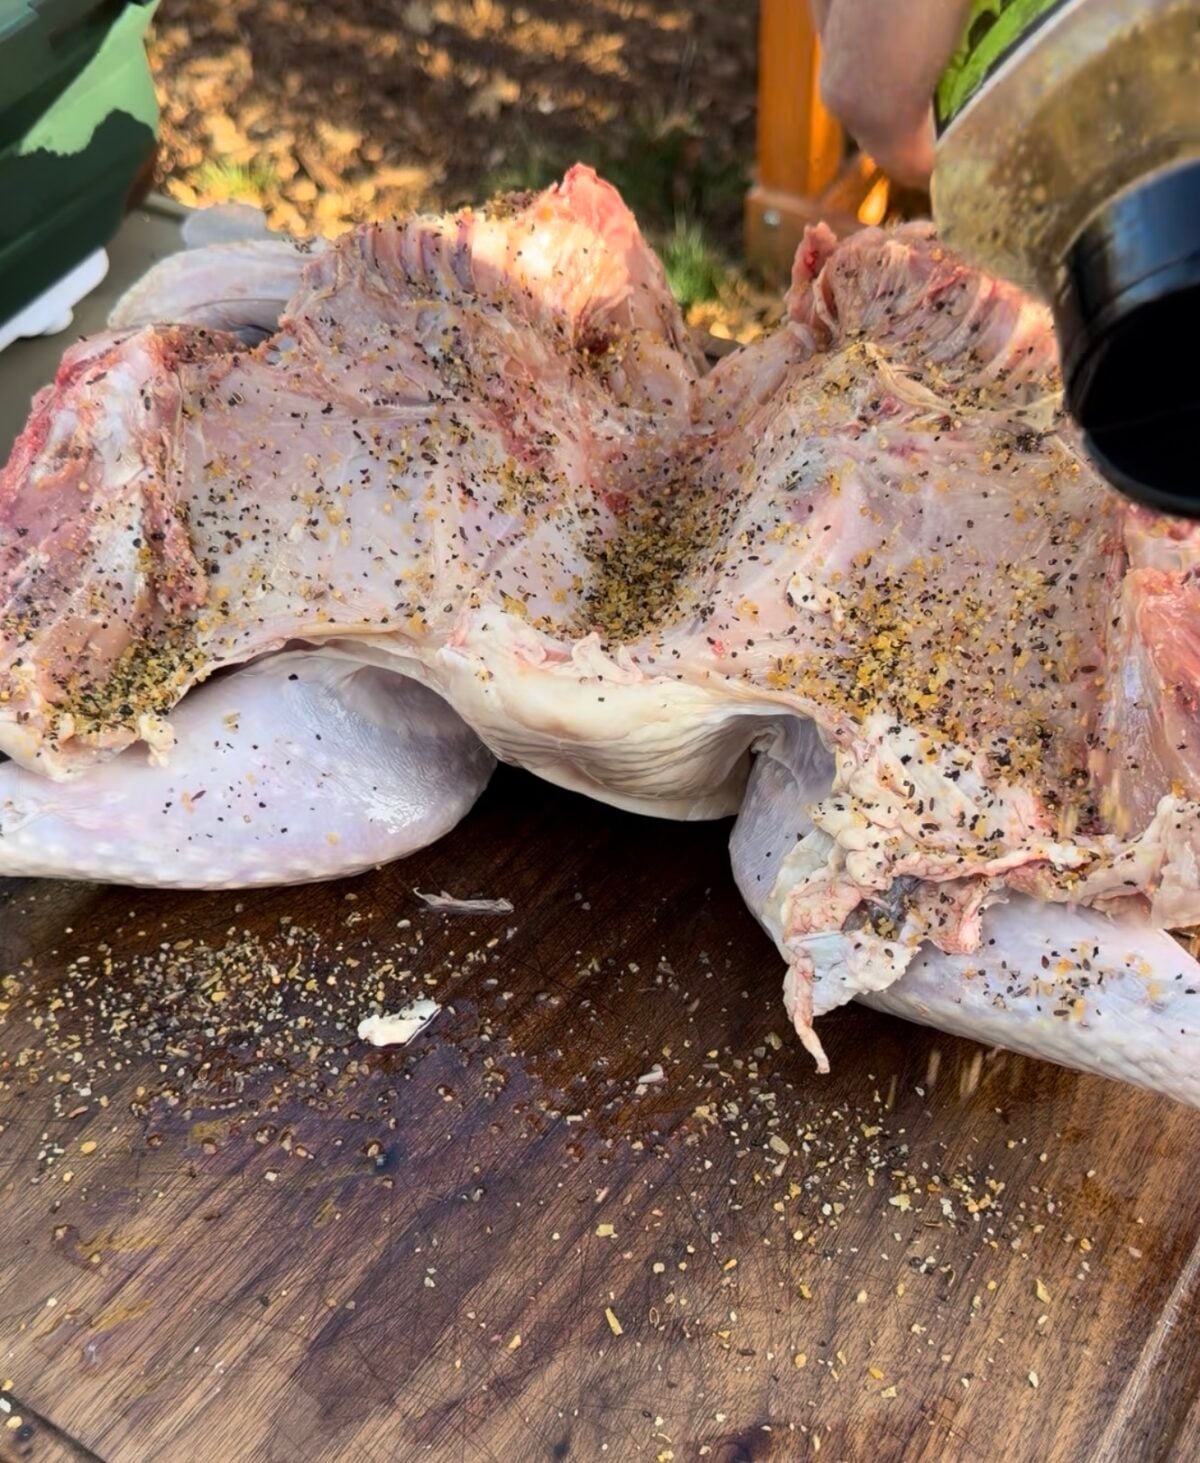
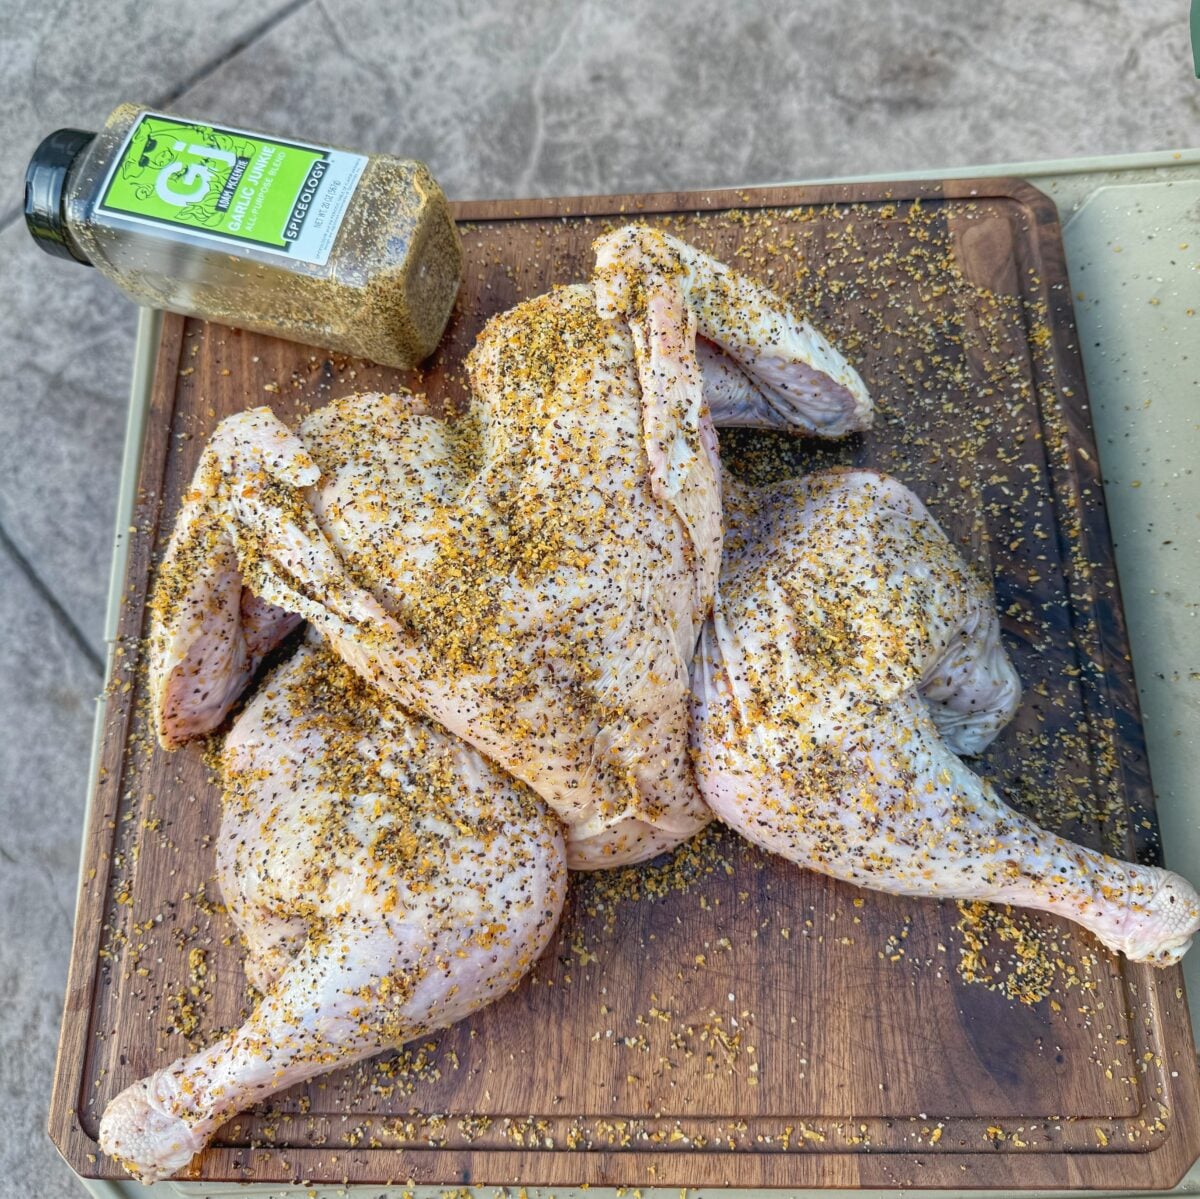
Once the turkey is ready for cooking, apply the finishing seasoning. In our preparation, seasoning went beneath the skin as well as over the outside. That puts some of the flavor directly against the meat.
Gently loosen the breast skin with your fingers, working carefully to keep it attached. Distribute the seasoning beneath it, then smooth the skin back into place. Season the exterior evenly so each section gets some coverage.
Account for the Salt Already Used
Because this turkey has already been in a seasoned brine, the final rub application deserves attention. The GSP in the brine and the seasoning on the outside both contribute to the finished flavor. Keep track of those amounts when preparing the recipe.
You can always offer additional seasoning at the table. During preparation, aim for an even application that complements the cider, citrus, and herbs. The turkey should still work with gravy and the other dishes on the plate.
Cooking Apple Cider Brined Turkey on the Pit Boss
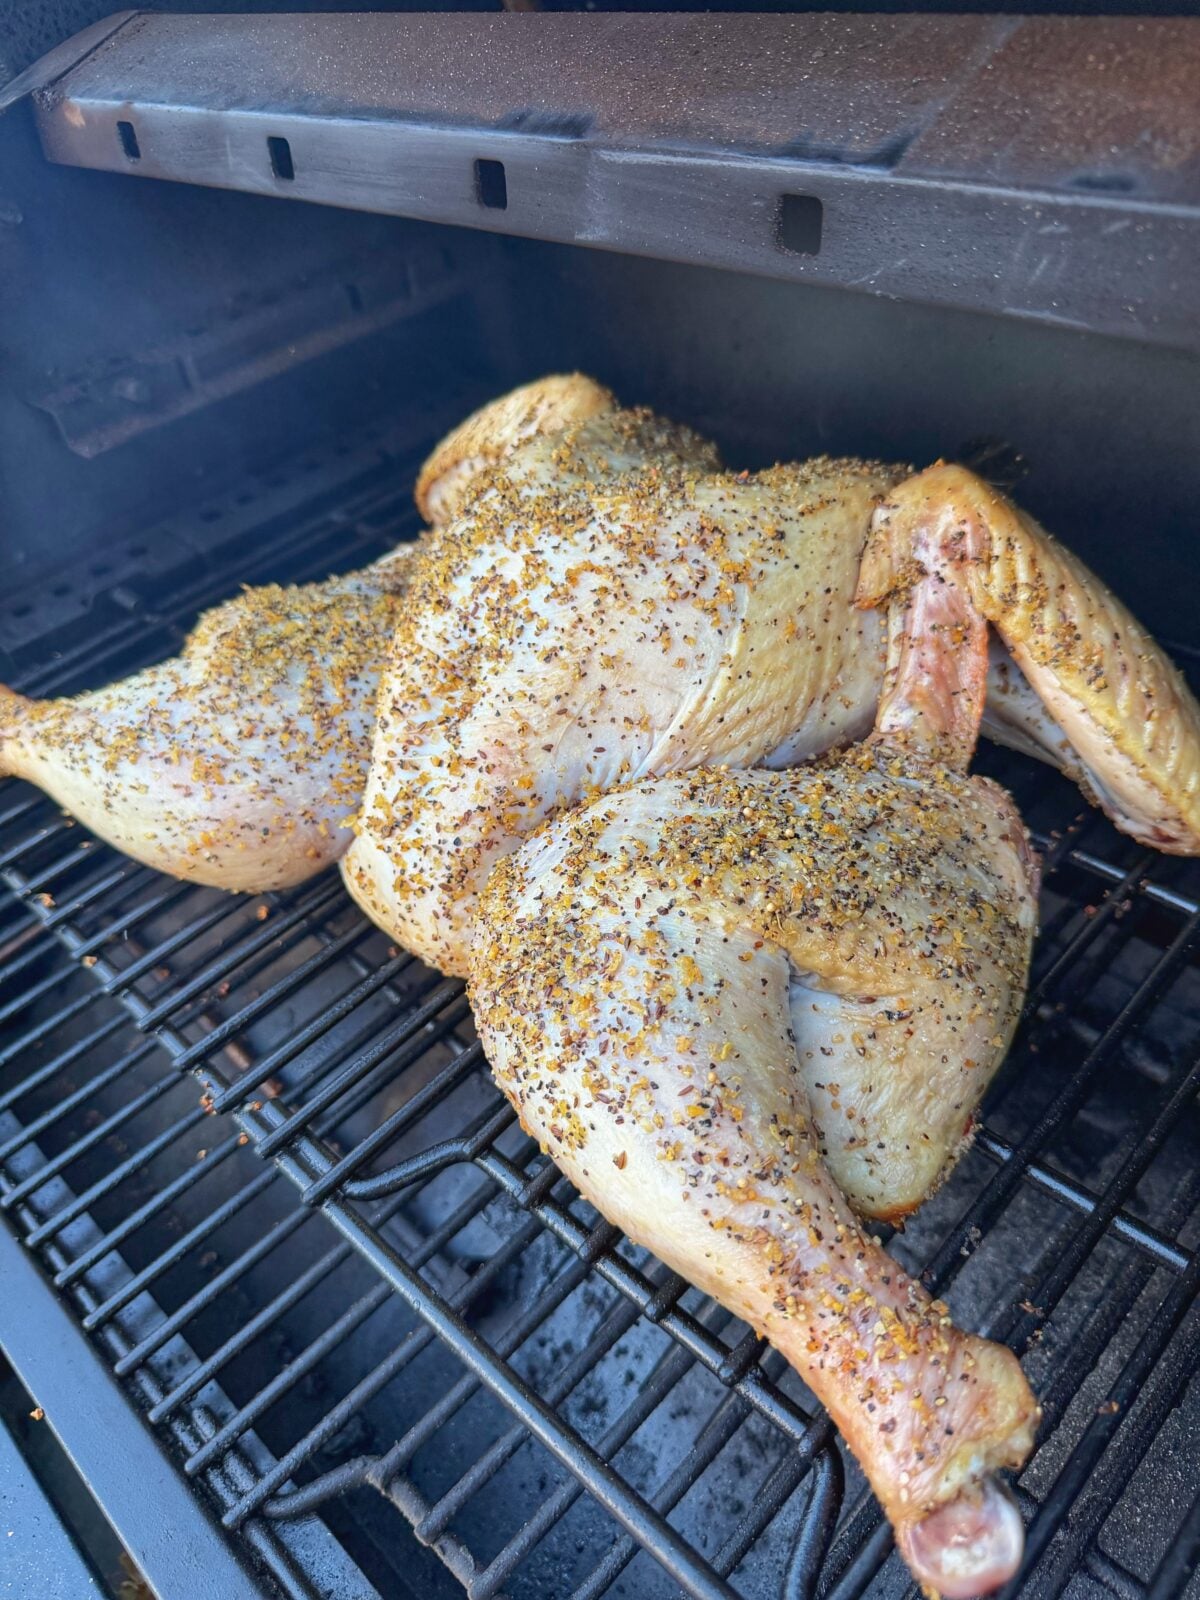
Preheat the Pit Boss thoroughly and arrange it for indirect cooking. Have your thermometer ready before placing the turkey on the grate. Once the bird is positioned, check that the lid closes comfortably and the probe cable sits clear of anything that could damage it.
Cooking outdoors means paying attention to the conditions around the grill. Here in Colorado, wind and cold can affect how the grill runs and how quickly it recovers after opening. Keep enough pellets on hand and give yourself some flexibility around serving time.
Use a Thermometer to Check Doneness
Place the probe in the thickest part of the breast, avoiding bone. As the turkey approaches doneness, check additional locations with an instant-read thermometer. One reading gives you information about one area of a large bird.
USDA guidance calls for at least 165°F in the thickest part of the breast and the innermost portions of the thigh and wing. Check all of those areas before removing the turkey from the grill. nifa.usda.gov
Watch the Skin as the Turkey Cooks
The surface will change as the turkey cooks, giving you plenty to observe alongside the temperature readings. Check for uneven browning and pay attention to areas closest to stronger heat. Make adjustments based on what your grill is doing.
Avoid opening the lid constantly to check the color. A leave-in thermometer lets you follow progress between visual checks. That is particularly helpful during a busy holiday cook when several other dishes need attention.
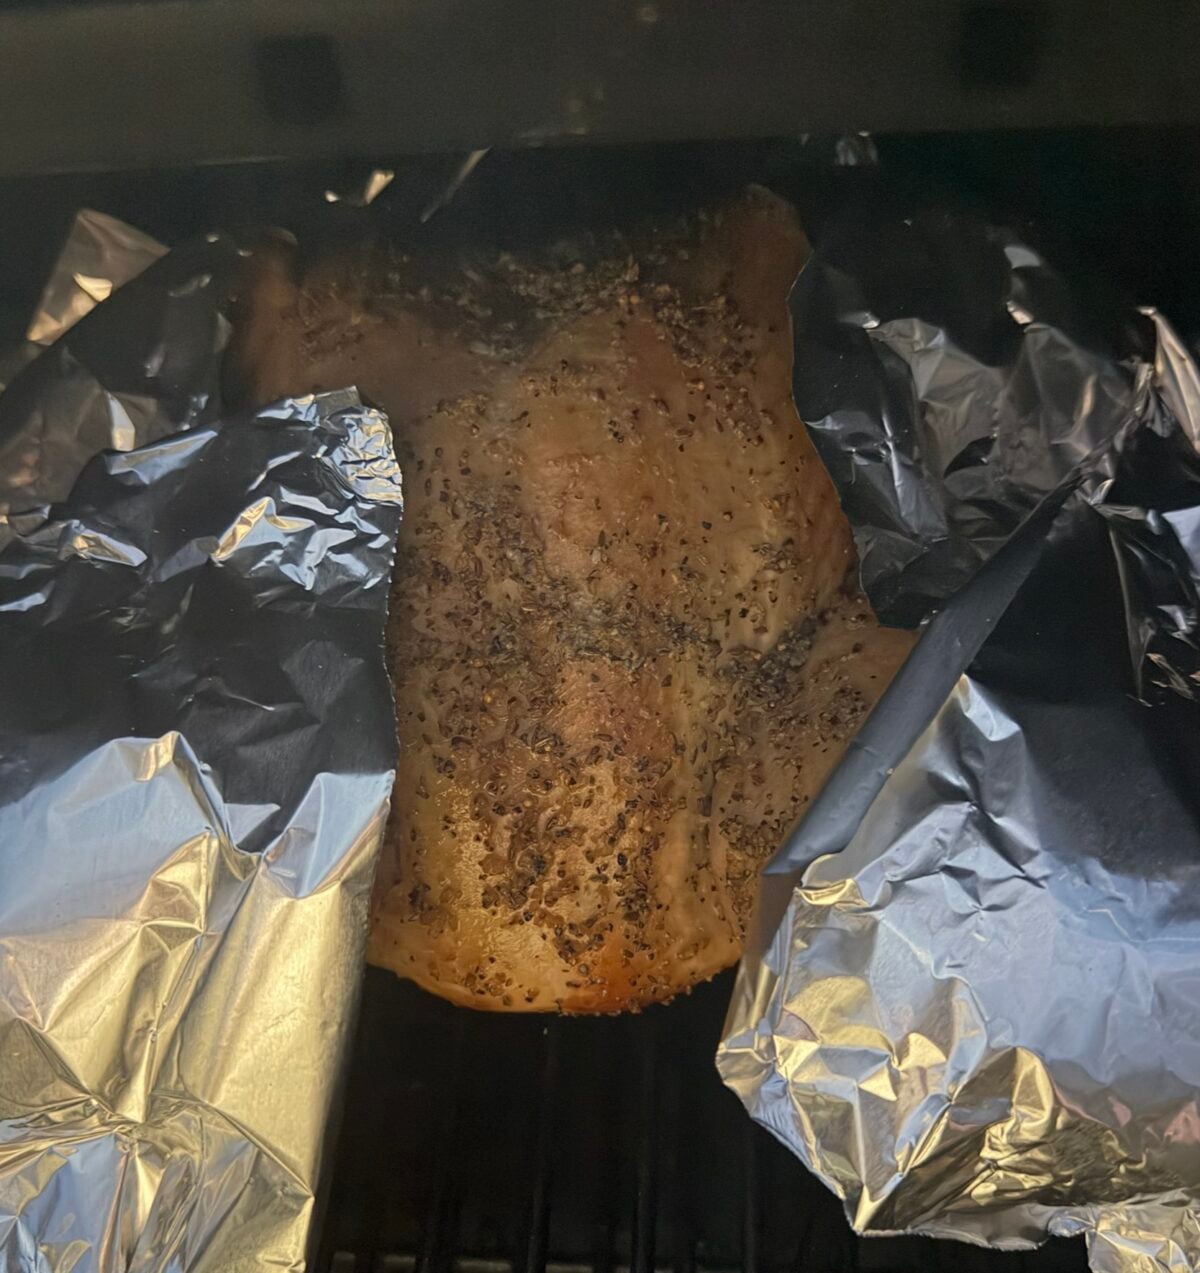
Rest and Carve the apple cider brined turkey
Transfer the cooked turkey to a large carving board or rimmed platter. Give it a short rest while you gather the carving knife, serving platter, and anything else you need. This also creates a natural window for finishing the last few sides.
With a spatchcocked turkey, the legs and breasts are easy to see and reach. Separate the leg quarters, remove the breast meat from the bone, and slice it for serving. Arrange the pieces so guests can choose white meat, dark meat, and some browned skin.
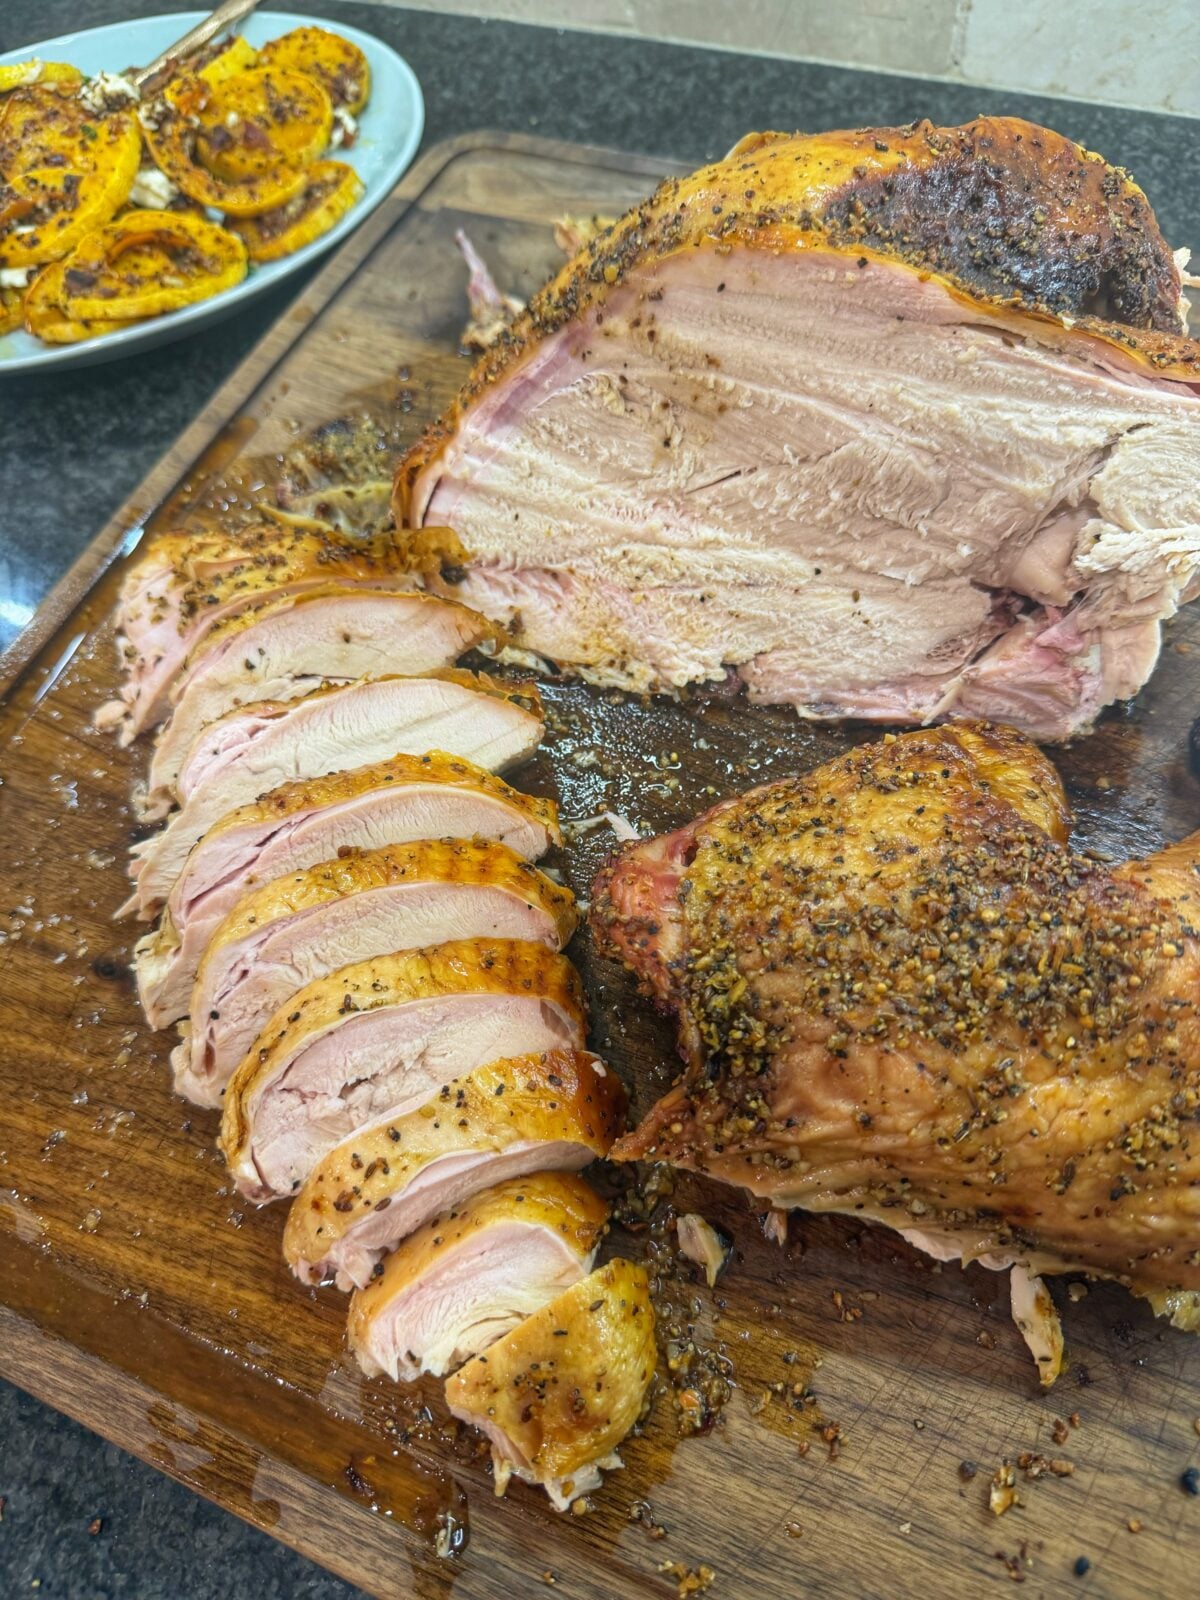
Keep the Presentation Simple
A platter of sliced turkey does not need much extra decoration. Arrange the pieces with the skin facing up where possible and keep the portions easy to lift. A few fresh herb sprigs can finish the platter if you have them available.
Save any usable carving juices for serving. They can accompany the sliced meat or become part of your gravy plan. Have a spoon or small pitcher ready so those juices make it to the table.
A few basic tools make preparing this apple cider brined turkey easier, especially when you’re moving from brining to air-drying, spatchcocking, and cooking. Here are the seasonings and equipment used in this cook, followed by some recipes to round out your holiday table.
Products Used in This Cook
- Pit Boss pellet grill — For cooking the spatchcocked turkey outdoors and keeping the kitchen oven available for sides.
- Pit Boss GSP Rub — The garlic, salt, and pepper blend used in the apple cider bourbon brine.
- Garlic Junkie by Spiceology — My garlic-forward seasoning for the turkey before it goes on the grill. Find it through my shop. Shop This Jew Can Que Seasonings
- Food-safe brining tub — Large enough to hold the turkey and brine, with room to turn the bird halfway through the soak.
- Wire rack and drip-catching tray — For the turkey’s uncovered rest in the refrigerator.
- Poultry shears — For removing the backbone before flattening the turkey.
- Meat thermometer — For monitoring the turkey during cooking and checking multiple areas before serving.
- Large carving board and sharp knife — For breaking down the finished bird and slicing the breast meat.
What to Serve With Apple Cider Brined Turkey
The apple, citrus, and herb combination works with a traditional Thanksgiving spread. Stuffing, mashed potatoes, cranberry sauce, and green vegetables all make sense beside it. You can keep your usual sides and let the turkey bring a different preparation to the meal.
Our hot honey butternut squash is another option for the same table. The rounds get topped with bacon, pecans, and goat cheese after cooking. Spoon bread also fits alongside turkey, particularly when you want a side that is easy to scoop and serve.
Plan the Grill Around Your Sides
If several dishes need the Pit Boss, work out the cooking order in advance. Temperature requirements and available grate space will determine what can share the grill. A turkey takes up enough room that it deserves its own place in the plan.
Prepare toppings, serving dishes, and cold components while the turkey cooks. Those smaller jobs are easy to finish ahead. When the bird comes off, you can focus on carving and getting dinner served.
Holiday Sides to Serve With Turkey
Build your holiday menu around a combination of creamy, cheesy, and vegetable sides. These recipes work well alongside the apple cider, citrus, herbs, and savory seasoning in this turkey.
- Cast Iron Ham and Corn Spoonbread — Sweet corn, savory ham, and melted cheese baked into a soft, scoopable side dish. Serve it straight from the skillet alongside your turkey. Make the Ham and Corn Spoonbread.
- Twice Baked Potatoes on the Pit Boss Navigator — A hearty potato side to add to your backyard holiday menu. Make the Twice Baked Potatoes.
- Wood Fired Brussels Sprouts in the Ooni Oven — Put another backyard cooker to work while the turkey occupies the Pit Boss. Make the Wood Fired Brussels Sprouts.
- Green Bean Casserole — A familiar holiday side to serve with sliced turkey and the rest of your Thanksgiving favorites. Make the Green Bean Casserole.
Leftover Apple Cider Brined Turkey
Leftovers are part of the reason I like cooking a turkey at home. Sliced breast meat works in sandwiches and wraps, while smaller pieces are useful in quesadillas, rice bowls, and soup. Keep the seasoning of the next meal in mind as you portion the meat.
Refrigerate leftovers within two hours, using shallow containers, and use refrigerated turkey within three to four days. Freeze portions you want to keep longer. Packing the meat in meal-size amounts makes it easier to use later.
Turn It Into Another Family Dinner
A turkey quesadilla is an easy place to start, especially after several days of holiday food. Add chopped turkey and cheese to a tortilla, then cook until the filling is hot and the tortilla is crisp. Serve with whatever toppings your family likes.
Turkey sandwiches are another quick option for a school-day lunch. Slice some of the breast meat before storing it so assembly takes less work. A little preparation after the holiday meal can cover another meal during the week.
Make Apple Cider Brined Turkey Part of Your Holiday Plan
This apple cider brined turkey starts with familiar ingredients and a preparation schedule you can spread across two days. Our 12-pound bird spent 12 hours in the brine, with a halfway flip, followed by 12 hours uncovered in the refrigerator. From there, it was flattened, seasoned, and cooked on the Pit Boss.
That is the kind of backyard cooking I enjoy sharing as a dad, teacher, and cookbook author. There is room to learn a technique, make something for the family, and keep using it for future meals. Save this apple cider brined turkey for your holiday cooking plans, and share how it turns out in your backyard.
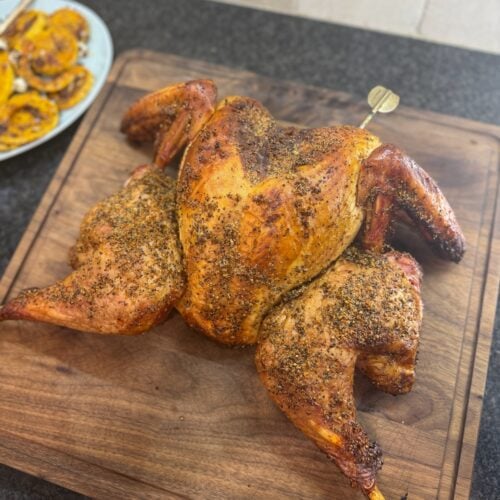
Apple Cider Brined Turkey

Equipment
- Pit Boss pellet grill
- Food-safe brining container or bag with a supporting vessel
- Large pot
- Rimmed sheet pan and wire rack
- Poultry shears
- paper towels
- Leave-in and instant-read thermometers
- Large carving board and knife
Ingredients
- 1 turkey 12 pounds
- ½ gallon apple cider
- 2 teaspoons kosher salt
- 1/2 gallon cold water
- 1/2 cup Bourbon
- 4 tbsp Pit Boss GSP rub
- 2 Oranges
- 1 Lemon
- 1 bunch fresh sage
- 1 bunch fresh thyme
- 2 sticks butter divided – one stick cut into pats, one stick melted
- 4 tbsp Garlic Junkie seasoning
Instructions
- Prepare the brine with the cider, water, salt, GSP rub, bourbon, sliced citrus, and herbs. Stir to combine and dissolve the salt. If heated, chill completely to 40°F or below before adding the turkey.
- Place the turkey in the cold brine and refrigerate for 12 hours. Flip after 6 hours.
- Remove the turkey, discard the brine, and pat thoroughly dry.
- Place on a rack over a rimmed sheet pan. Refrigerate uncovered for 12 hours.
- Spatchcock the turkey before grilling. Confirm where this step fell in your actual preparation sequence.
- Apply finishing seasoning beneath the skin and over the exterior.
- Preheat the Pit Boss for indirect cooking. Grill temperature and approximate cooking time to confirm.
- Cook until the breast, innermost thigh, and innermost wing each register at least 165°F.
- Rest briefly, carve, and serve.

Leave a Reply